Search
Close this search box.

Create QR Codes with the VirtualText App

Create QR Codes with the VirtualText App

Share This Post

Create QR Codes with the VirtualText App

While it may have taken awhile for consumers to fully understand and embrace QR Codes, we’ve collectively moved on from the early adoption phase. According to data from Statista,

In 2021, 75.8 million smartphone users in the United States scanned a QR code on their mobile devices, up by 15.3 percent compared to 2020. Usage of mobile QR code scanners is projected to experience constant growth, reaching approximately 99.5 million users in the U.S. by 2025. 

Most early QR Codes simply directed the person who scanned them to a webpage and users created QR Codes in simple, free apps where they plugged in their desired URL. Since then, use cases have become much more dynamic. Now, you can create QR Codes in the VirtualText App, allowing you to implement your own dynamic workflows that improve your customers’ experience with your products and services. 

Create QR Codes with the VirtualText App

When to Create QR Codes

The QR in “QR Codes” stands for Quick Response. Therein lies the key: QR Codes should be used when they can provide a shortcut for customers. Scanning a QR Code created from the VirtualText App will send a text message from that person to your designated phone number with the designated Auto-Reply Keyword. An Auto-Reply Keyword is a trigger word that you set in your VirtualText App that when used, sends a Canned Response and can initiate further actions. Let’s break all that down with an example:

  1. Your customer has parked in a curbside pickup spot and scans the QR Code as directed on your signage.
  2. This sends a text message to your curbside pickup team that the curbside pickup customer has arrived. 
  3. A Canned Response goes out to the customer acknowledging their arrival. 
  4. From here, the customer and curbside pickup team have a direct line of communication and can text back and forth if need be. 
  5. The curbside pickup team may also elect to integrate these messages with an ordering system that can do things like give an estimated wait time to the customer or log the arrival.
Create QR Codes with the VirtualText App

How to Create QR Codes

First, you’ll need the VirtualText App. It is available on most of our business phone plans and existing customers can request access to this feature with our Customer Service Team. Once you’re logged into the application, take the following steps to create QR Codes (directions and images below are from the desktop version):

  1. Click on Canned Responses in the left-hand menu and then click the button to “Add New Response”

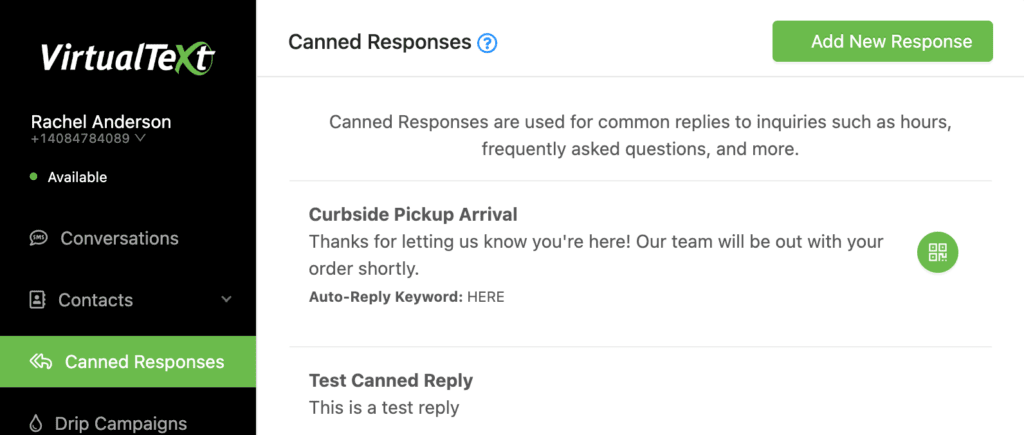
  2. Craft your message, give your message a name, and add an Auto-Reply Keyword. When your user scans the code, it will prompt them to send your Auto-Reply Keyword to your phone number – so don’t skip this step! You can even use dynamic Merge Fields to include information like your customer’s name.

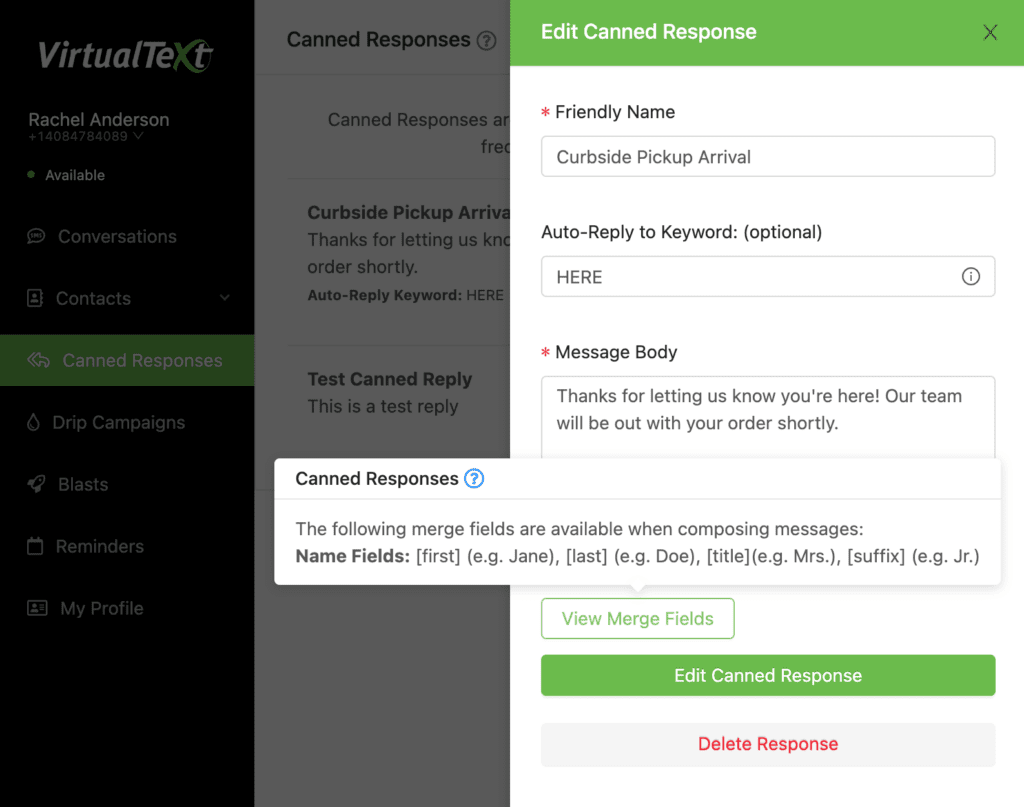
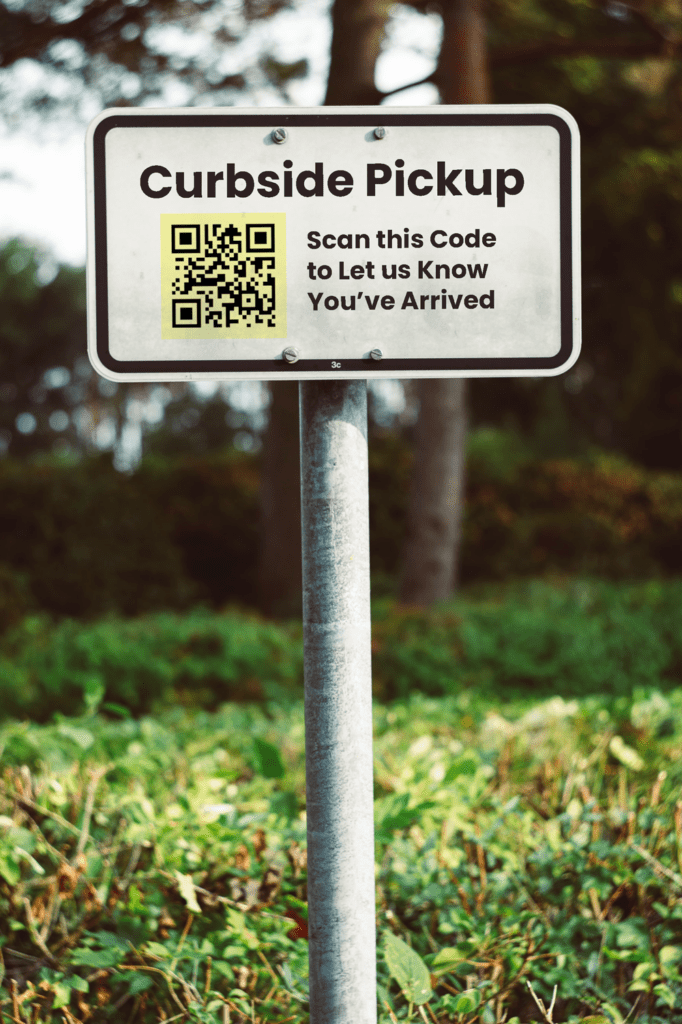
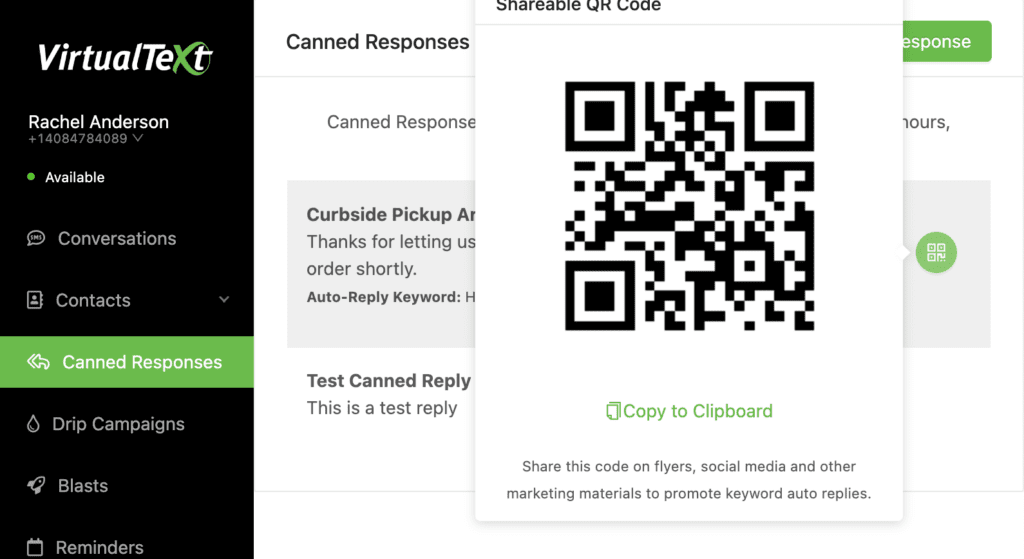
  3. Once you’ve saved your Canned Response, a QR Code is automatically generated. Hover over the QR Code icon to copy your QR Code and then paste in your marketing materials, or send to your creative team.

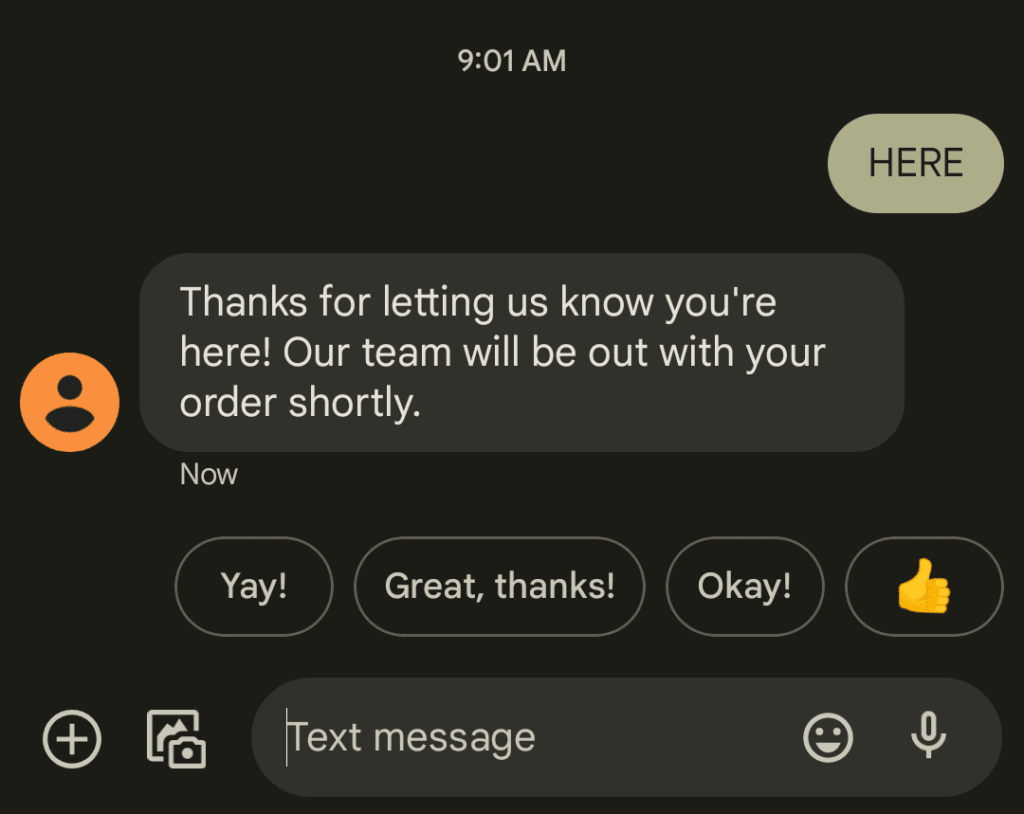
  4. Test it out! Scan your QR Code, send the prompted message, and then see your Canned Response come in as an Auto-Reply instantaneously!

Ready to create QR Codes for your business? Check out the VirtualText App and create better experiences for your customers and shared, easier workflows for your teams.

More To Explore on the VirtualPBX Blog