In a previous blog post this week, we showed you how you can log SMS messages into a Google Sheet with the Zapier task automation service. Today’s post will build on that learning by introducing ACD Queues status changes and Webhooks, which we offer on many of our Business Phone Plans.
An introduction here will show you how ACD Queues and Webhooks are used. Following sections will dive into the creation of an automation and the recording of ACD Queues status changes in a Google Sheet.
If you want to learn more about how VirtualPBX uses automations every day, check out our COO, Lon Baker, who talks briefly about our business in this short video:
What Is ACD Queues and Webhooks?
The two features of ACD Queues and Webhooks are offered in several of our Business Phone Plans. Larger companies tend to use these features to handle large volumes of inbound calls and automate their workflows.
ACD Queues
ACD Queues works by channeling inbound calls into funnels called queues that multiple agents can answer calls from. As a consumer, you may have experienced being in a queue when you called the customer support line of a business you support. ACD Queues handles routing of callers to the appropriate agents so customers can be connected with a support agent efficiently.
ACD Queues allows agents to set themselves as Ready or Away so they can respectively accept calls or remove themselves from accepting calls. Changes in status are a common occurrence, and you can use Webhooks to monitor those changes as they happen.
Webhooks
A webhook is a URL similar to others you have visited. Zapier, which will be shown in the next section, lets you use webhook URLs that look like this: https://hooks.zapier.com/hooks/catch/123456/abcdef/. You can configure the Webhooks feature of your VirtualPBX account to send information to a similar URL that Zapier will provide for you.
The VirtualPBX Webhooks feature in your account can be used to listen for events (such as logging into or logging out of a queue) and will immediately transfer information about those events to the URL. Zapier then allows you to easily move that information to other locations. The tutorial here will show you how to move the webhook information into a spreadsheet.
Getting Started With Zapier
Zapier lets you sign up for free. However, to use its Webhook feature, a paid account is required.
 To create your first zap (the workflow that will capture webhook information), click the Make a Zap button at the top-left of your main dashboard.
In the next screen, you will be presented with a search box to choose the trigger for your zap. A trigger is what the zap will use to listen for incoming information. Search for and choose the Webhooks by Zapier trigger to have a webhook listen for information from your VirtualPBX account.
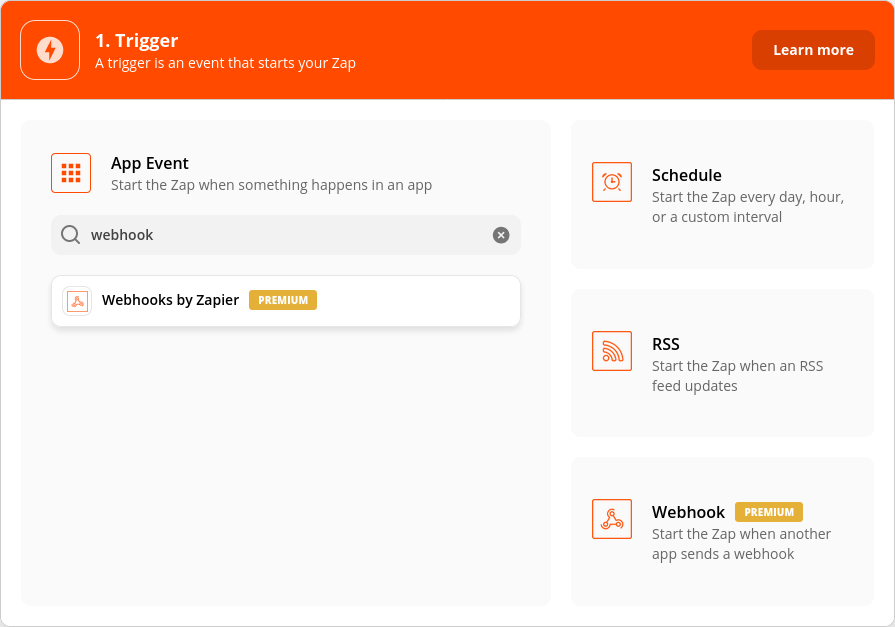
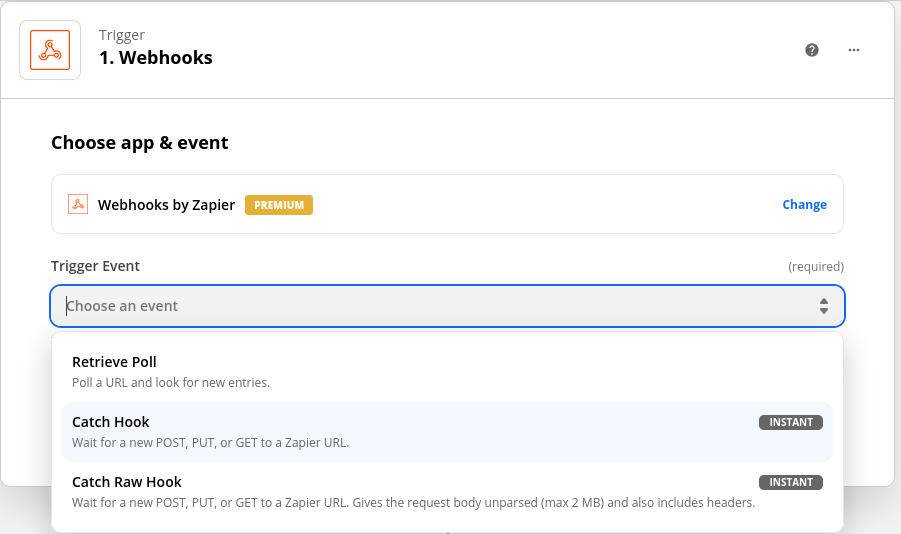
Then choose the Catch Hook trigger event. This will give you a custom URL you will use later. Copy the URL so you can paste it into your VirtualPBX Webhook setup.
Set Up Your Webhook in VirtualPBX
Set Zapier aside for now and log in to your VirtualPBX account. At the top-right of your dashboard, click the hamburger menu (three horizontal lines) and choose the Webhooks option.
The new screen you’re presented gives you the option to create a new webhook. At the top-right of your screen, click the “New Webhook” button. You can now add a name for your webhook and choose the trigger event of “ACD Queue Recipient Login.” This event will occur every time an agent logs in to your VirtualPBX ACD Queues account.

Now you can enter the URL that Zapier provided you in the previous step. When you click the Create Webhook button at the bottom of your screen, you will be sent back to your main Webhooks dashboard where your new entry will be shown as active.

Continue Your Automation in Zapier
The final step in setting up the trigger in your zap is to find some sample data. The Test Trigger section of your initial zap step will look for data, so if you haven’t already, you should have an agent log in to a queue in your VirtualPBX account.
Retrieval of that data will look something like this. These are the data points you have available to use in future steps in your zap:
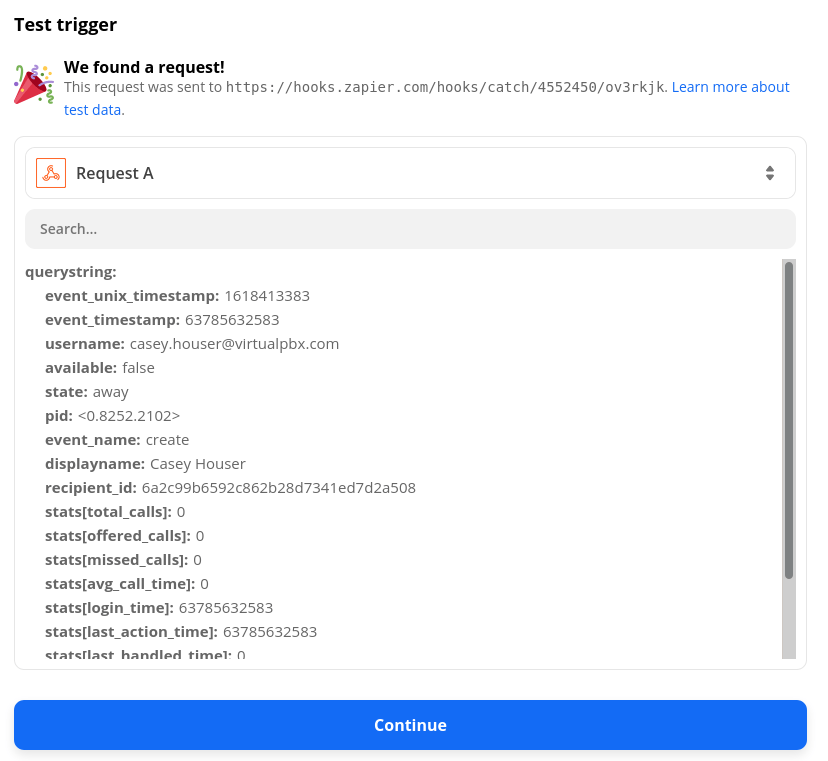
After you click the Continue button, you can create an action step in your zap. This action will occur automatically after your trigger is fired.
Search for “Google Sheets” and choose that app. Then choose the “Create Spreadsheet Row” Action Event and enter your Google account credentials.
You will need to create a Google Sheet. Our example sheet looks like this.

Now you can fill in the rest of the fields you want to populate when your zap runs. Think of the choices here as placeholders. With this Google Sheets action, you are creating a new row of data, and with these placeholders, you are telling your zap which type of data to fill in each column of the new row.
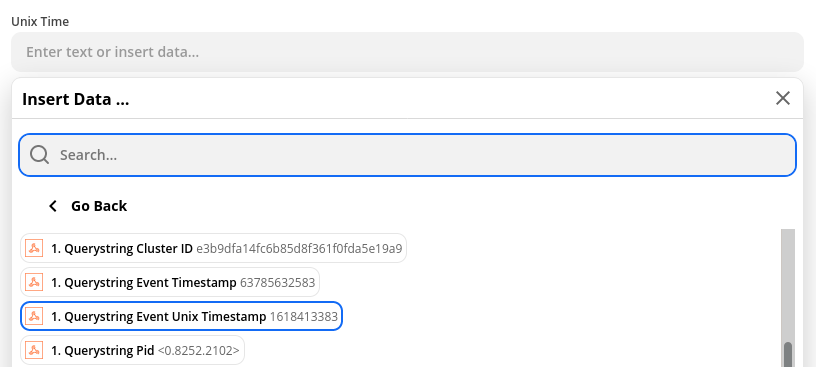
The first field, Unix Time, can be filled with a placeholder by clicking the that field in your zap and selecting “Querystring Event Unix Timestamp” from the menu.
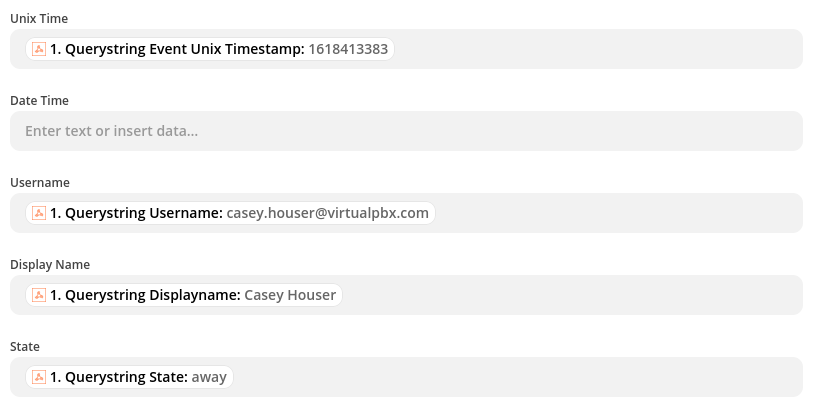
After filling in the rest of our fields, our zap looks like this. We have left the “Date Time” field blank on purpose; it will be addressed next.
Your “Date Time” Field
The “Date Time” column we have shown in our spreadsheet is calculated within the Google Sheet. Here’s the formula you can use to transform Column A (your Unix timestamp) into a human-readable timestamp:
=A2/86400+DATE(1970,1,1)-TIME(4,0,0)The quick explanation for why you need this formula is that the Unix timestamp starts on Jan. 01, 1970 and that Google Sheets starts counting from a date much earlier than that.
You take your Unix timestamp provided in the webhook, divide it by the number of seconds in a day, and then add that value to the date Google Sheets records from before 1970.
The last part of the equation here lets you adjust the timestamp to your timezone. The base date-time is in GMT. The adjustment shown here – “-TIME(4,0,0)” – is for Eastern time, which is GMT-4. You can adjust the TIME() values to your timezone. If you live in GMT-7, then change it to “-TIME(7,0,0)”, and if you live in GMT+3, change it to “+TIME(3,0,0)”.
Keep in mind that you are either subtracting or adding TIME() based on where you live. Something like “+TIME(-4,0,0) will not work.
Testing Your Zap’s Functionality
Finally it’s time to test your zap. With all your values in place, click Continue to test your zap. Click the Test and Continue button to hopefully see a success message like this.
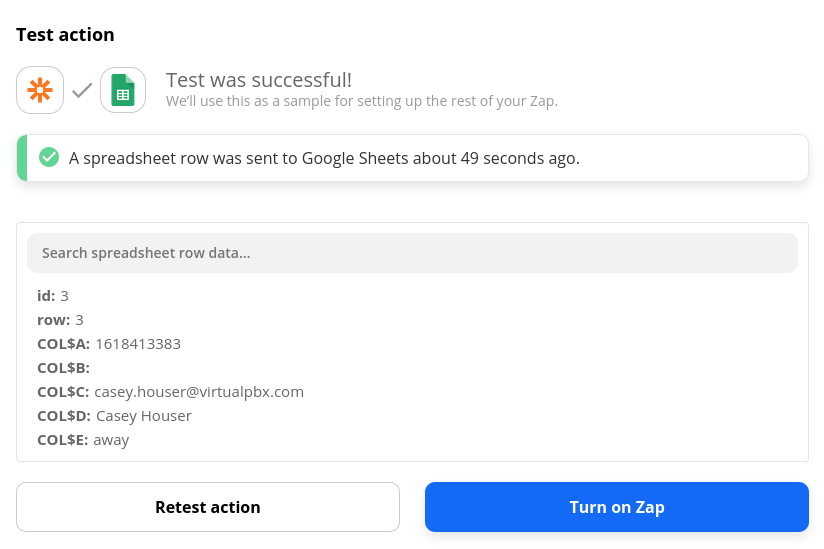
Your spreadsheet should then also be populated with your test values. Ours shows the correct data.

You can turn on your zap now to continue collecting sign-on notices as your team logs in to their queues.
Taking This One Step Further
With a few more webhooks, you can monitor much more than logins. The VirtualPBX Webhooks collection of events is numerous and contains two more events you may be interested in trying:
- ACD Queue Recipient Logout
- ACD Queue Recipient Status Change
These two events pair well with our initial use of ACD Queue Recipient Login. Each one monitors exactly what their titles suggest, so you can use them to see when agents log in to queues, log out of queues, and change status to Ready or Away.
You can even see from our initial example that, in our spreadsheet, the user was marked as having a status as “away.” This is the default login status, so there’s nothing to worry about.
If you were to mark a timestamp alongside each event, however, you could see how much time passes between a user logging in for the day and when they change their status to “ready.”
Multiple Zaps but One Spreadsheet
In order to track all these changes, you will need to use more than one zap. The setup is exactly the same as the steps above except for two small changes:
- You will choose a different event in your Webhooks configuration (either “ACD Queue Recipient Logout” or “ACD Queue Recipient Status Change”)
- You must use a new webhooks URL that Zapier will give you
Each new zap will have its own unique Webhooks by Zapier trigger which is tied to a unique URL. Each URL gets its own webhook in your VirtualPBX setup. Ultimately, your VirtualPBX Webhooks screen will show three new webhooks that are all active and listening for separate events.

You can use the same Google Sheet or separate spreadsheets to log your changes.
Monitor Your ACD Queues Status
We hope this tutorial has been instructive and has placed you on the right path.
You can use this exact configuration to monitor your own ACD Queues status changes. You’re also free to create other webhooks and change your follow-up actions as you please. Maybe you want to log these changes in a Trello board or Airtable grid? We have several Zapier templates on our Zapier Integration page that are useful for getting you started with moving in other directions.
We’re also available 24/7 through live web chat to further assist with your needs.

