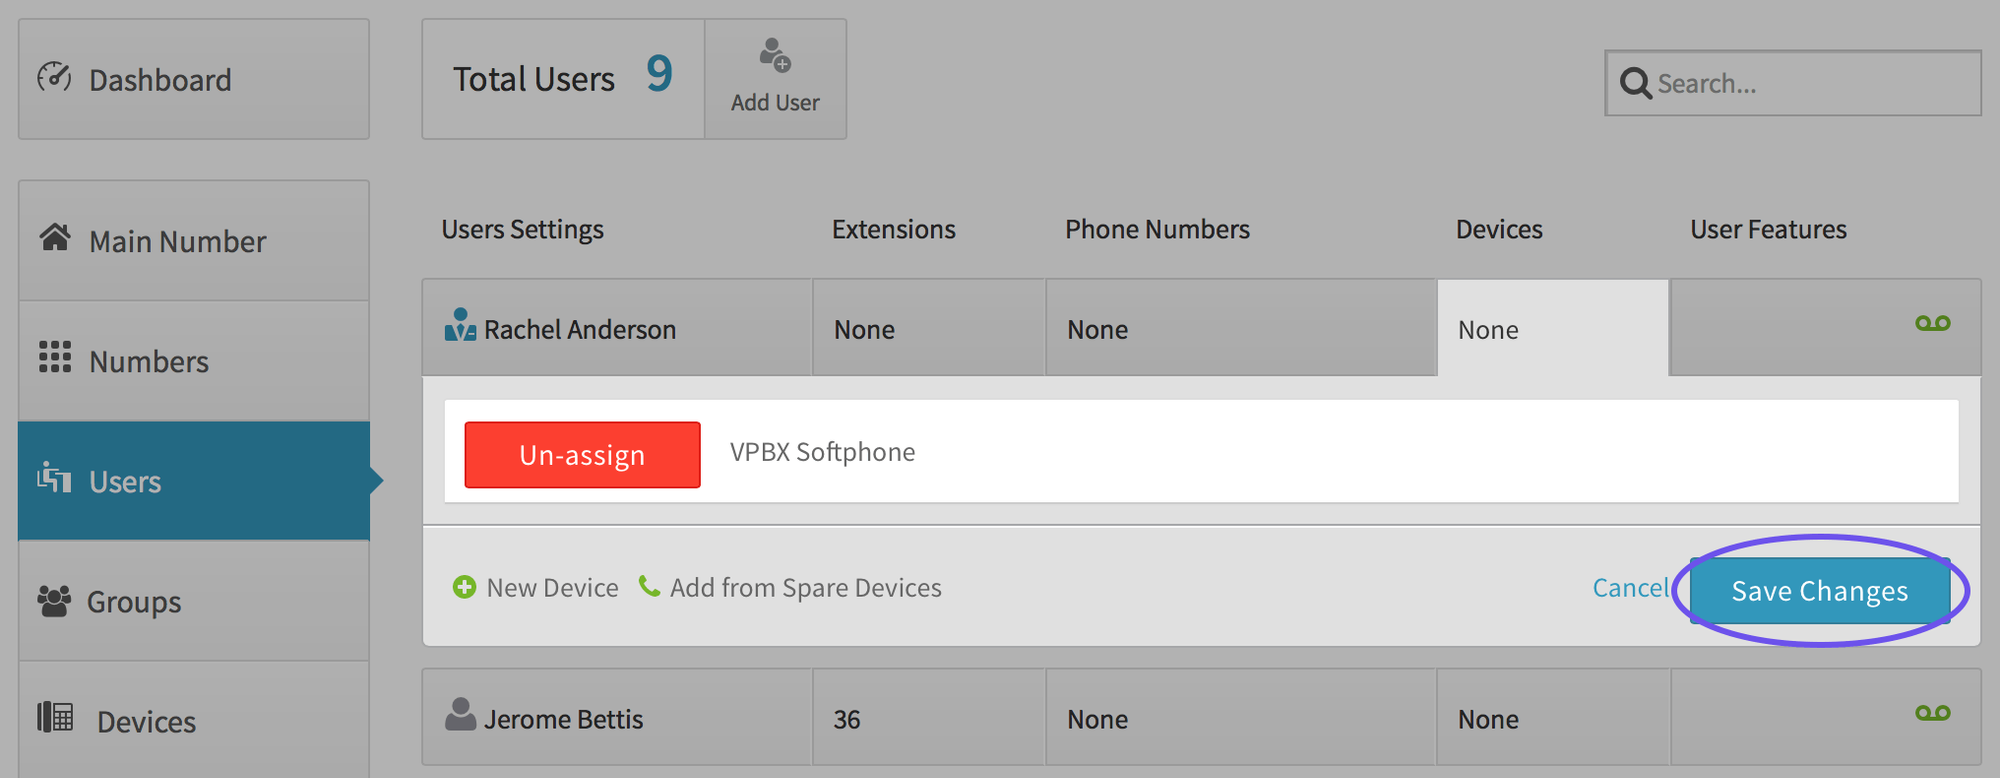
First, Create a Softphone or Retrieve Your Credentials
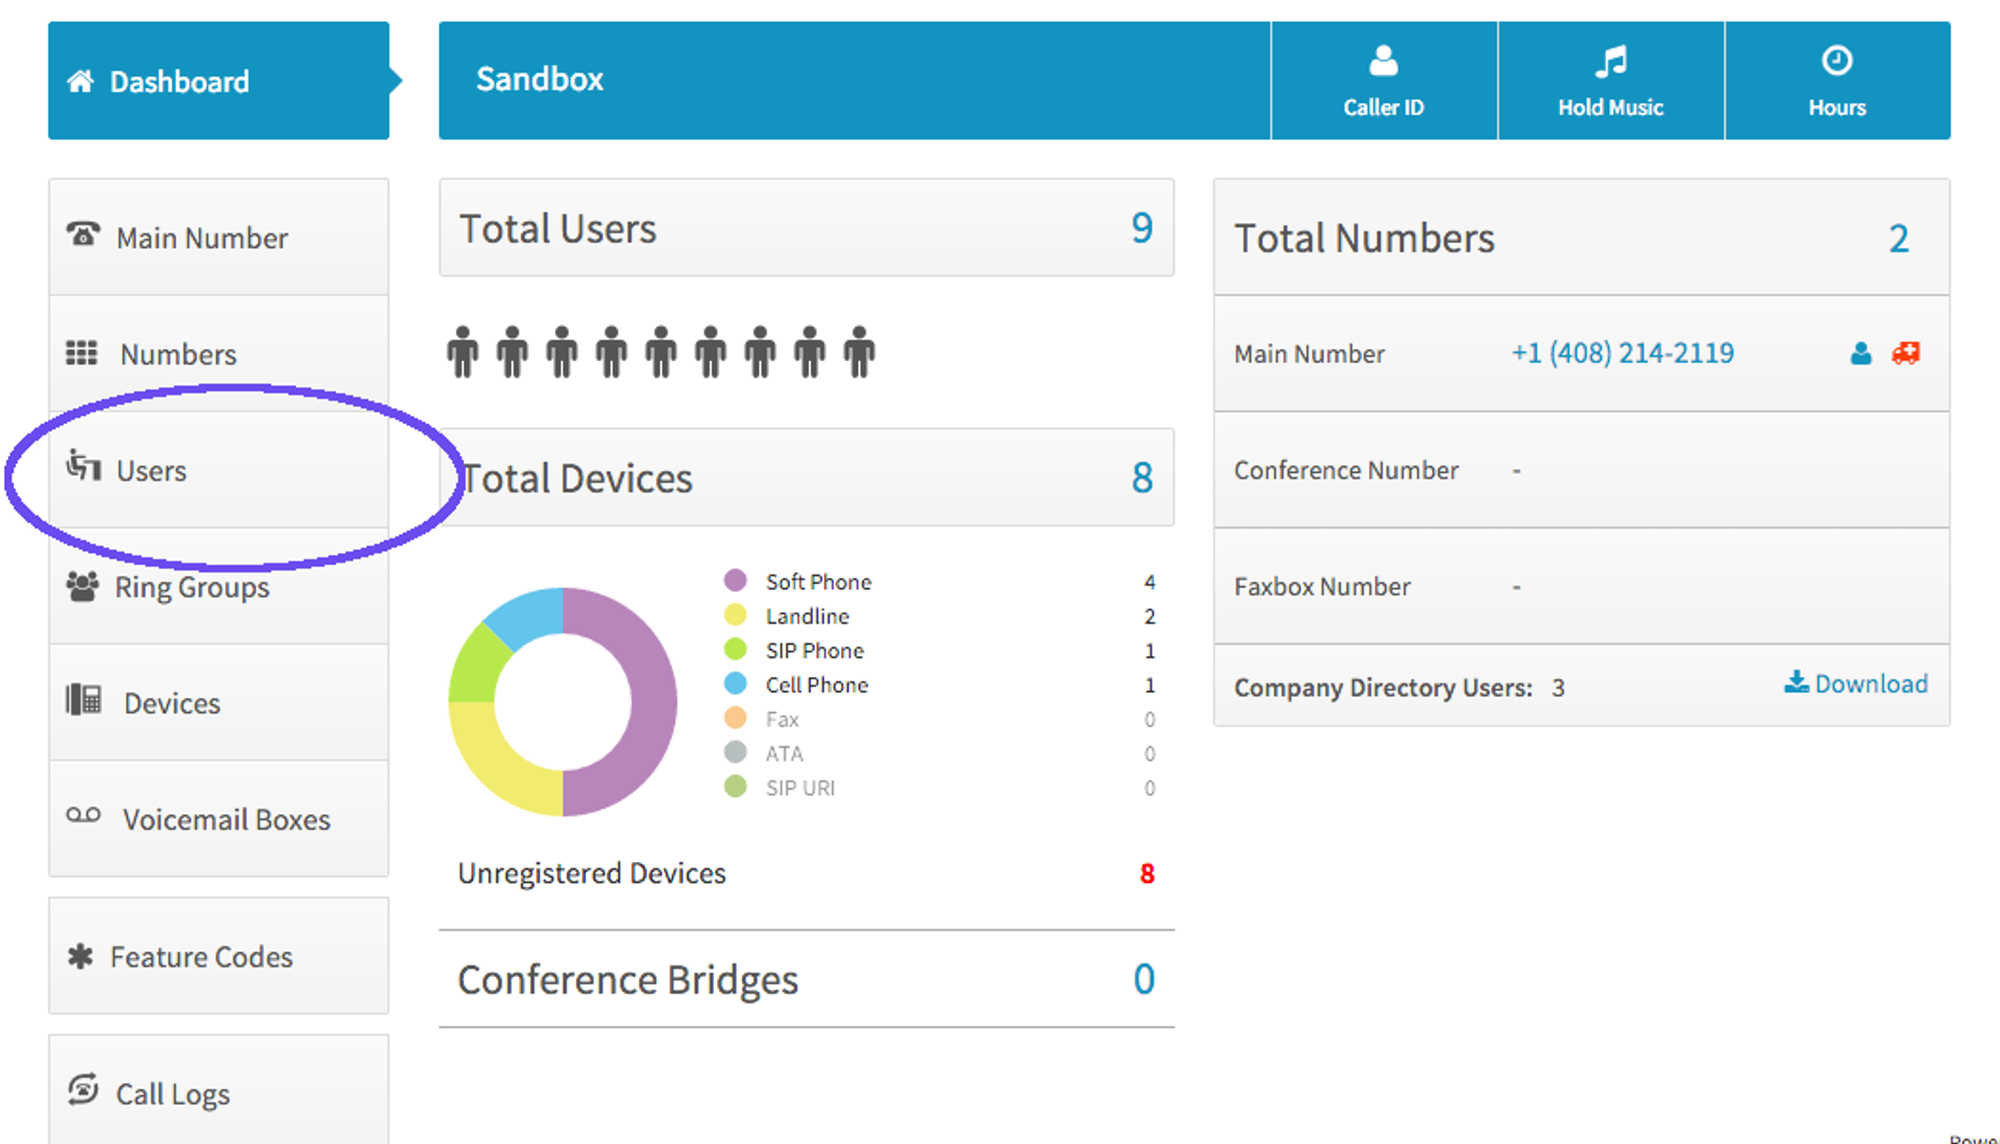
- In the Dashboard, click on Users
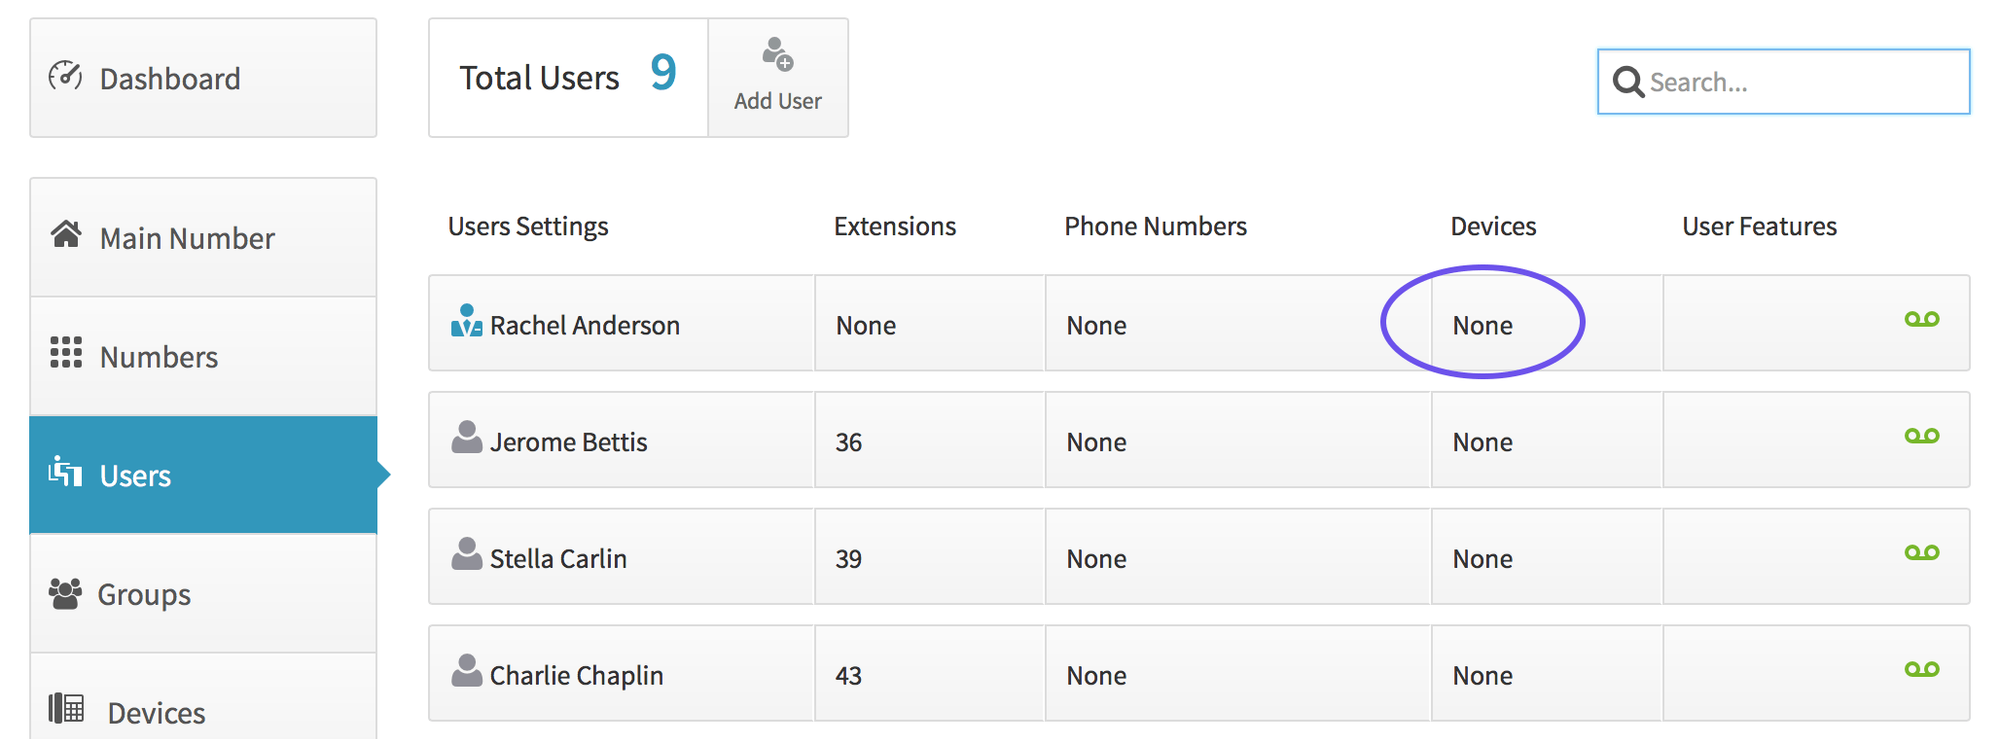
- Click Devices alongside the user you wish to assign the device
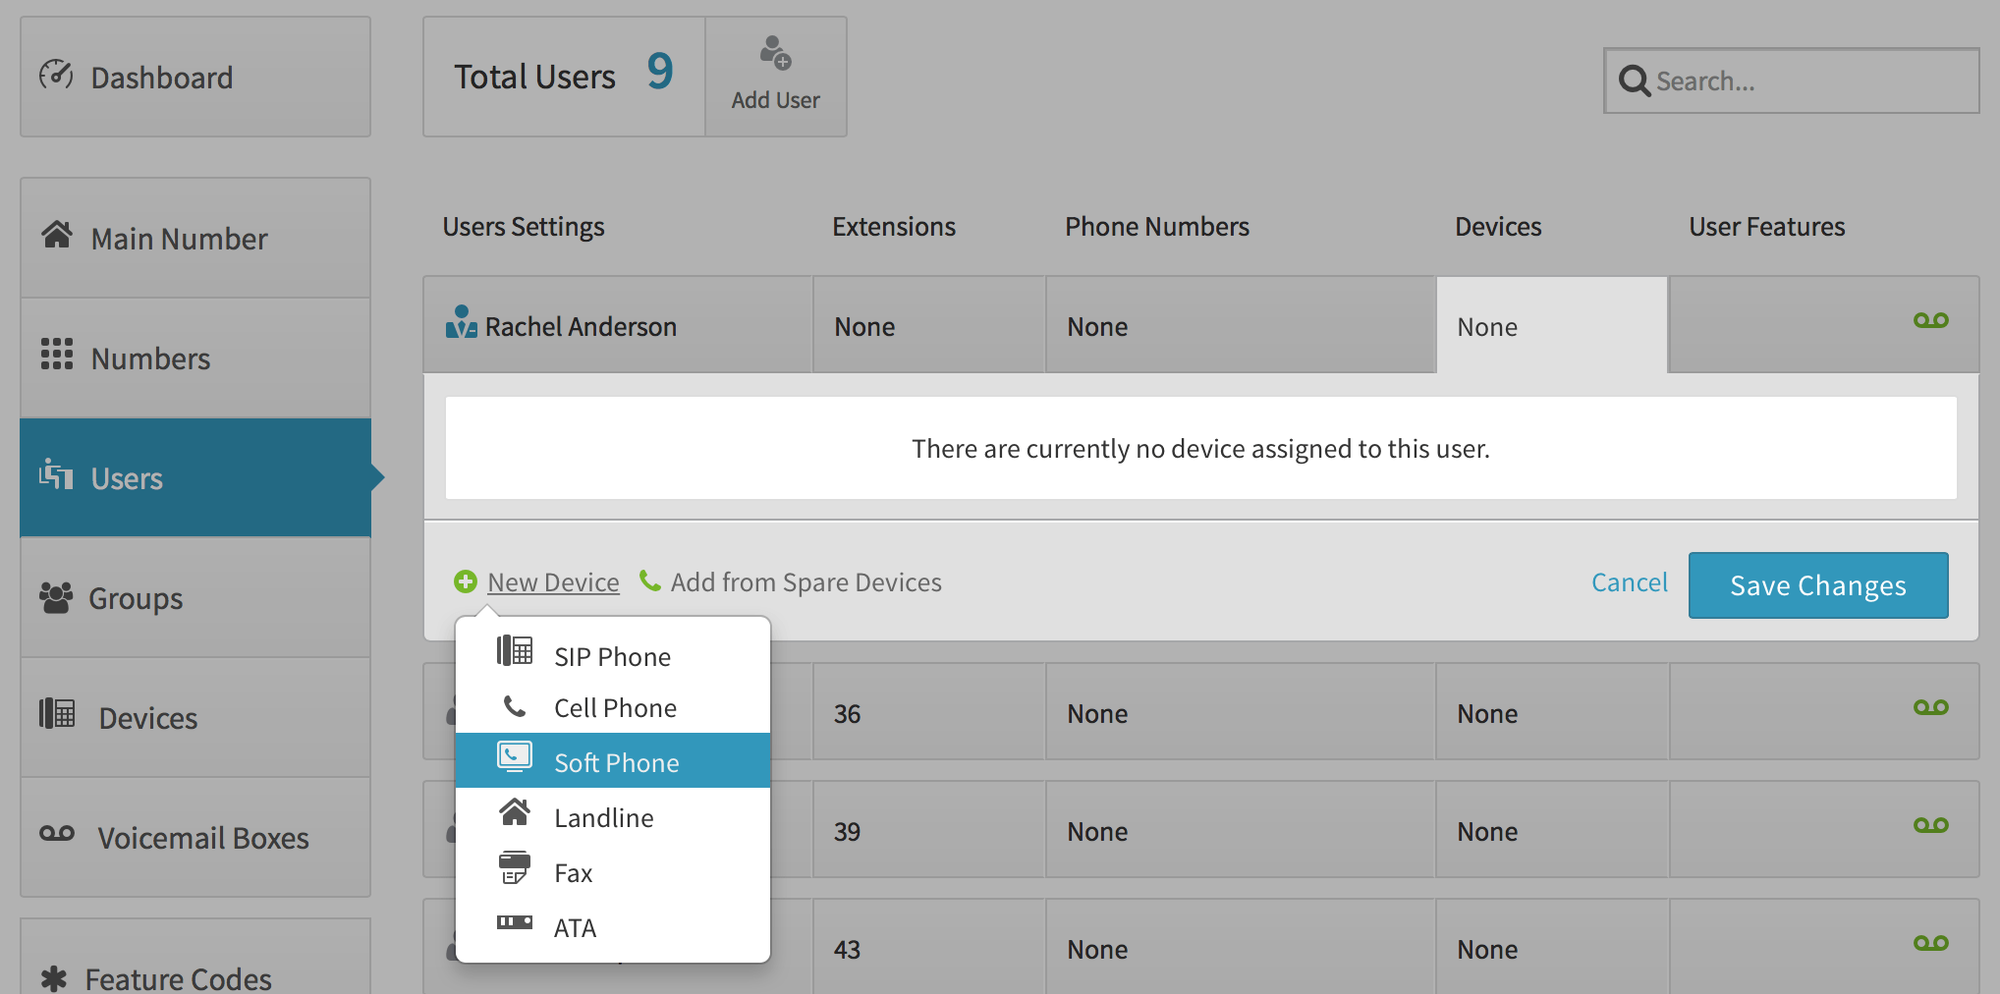
- Click Choose Device and select Softphone
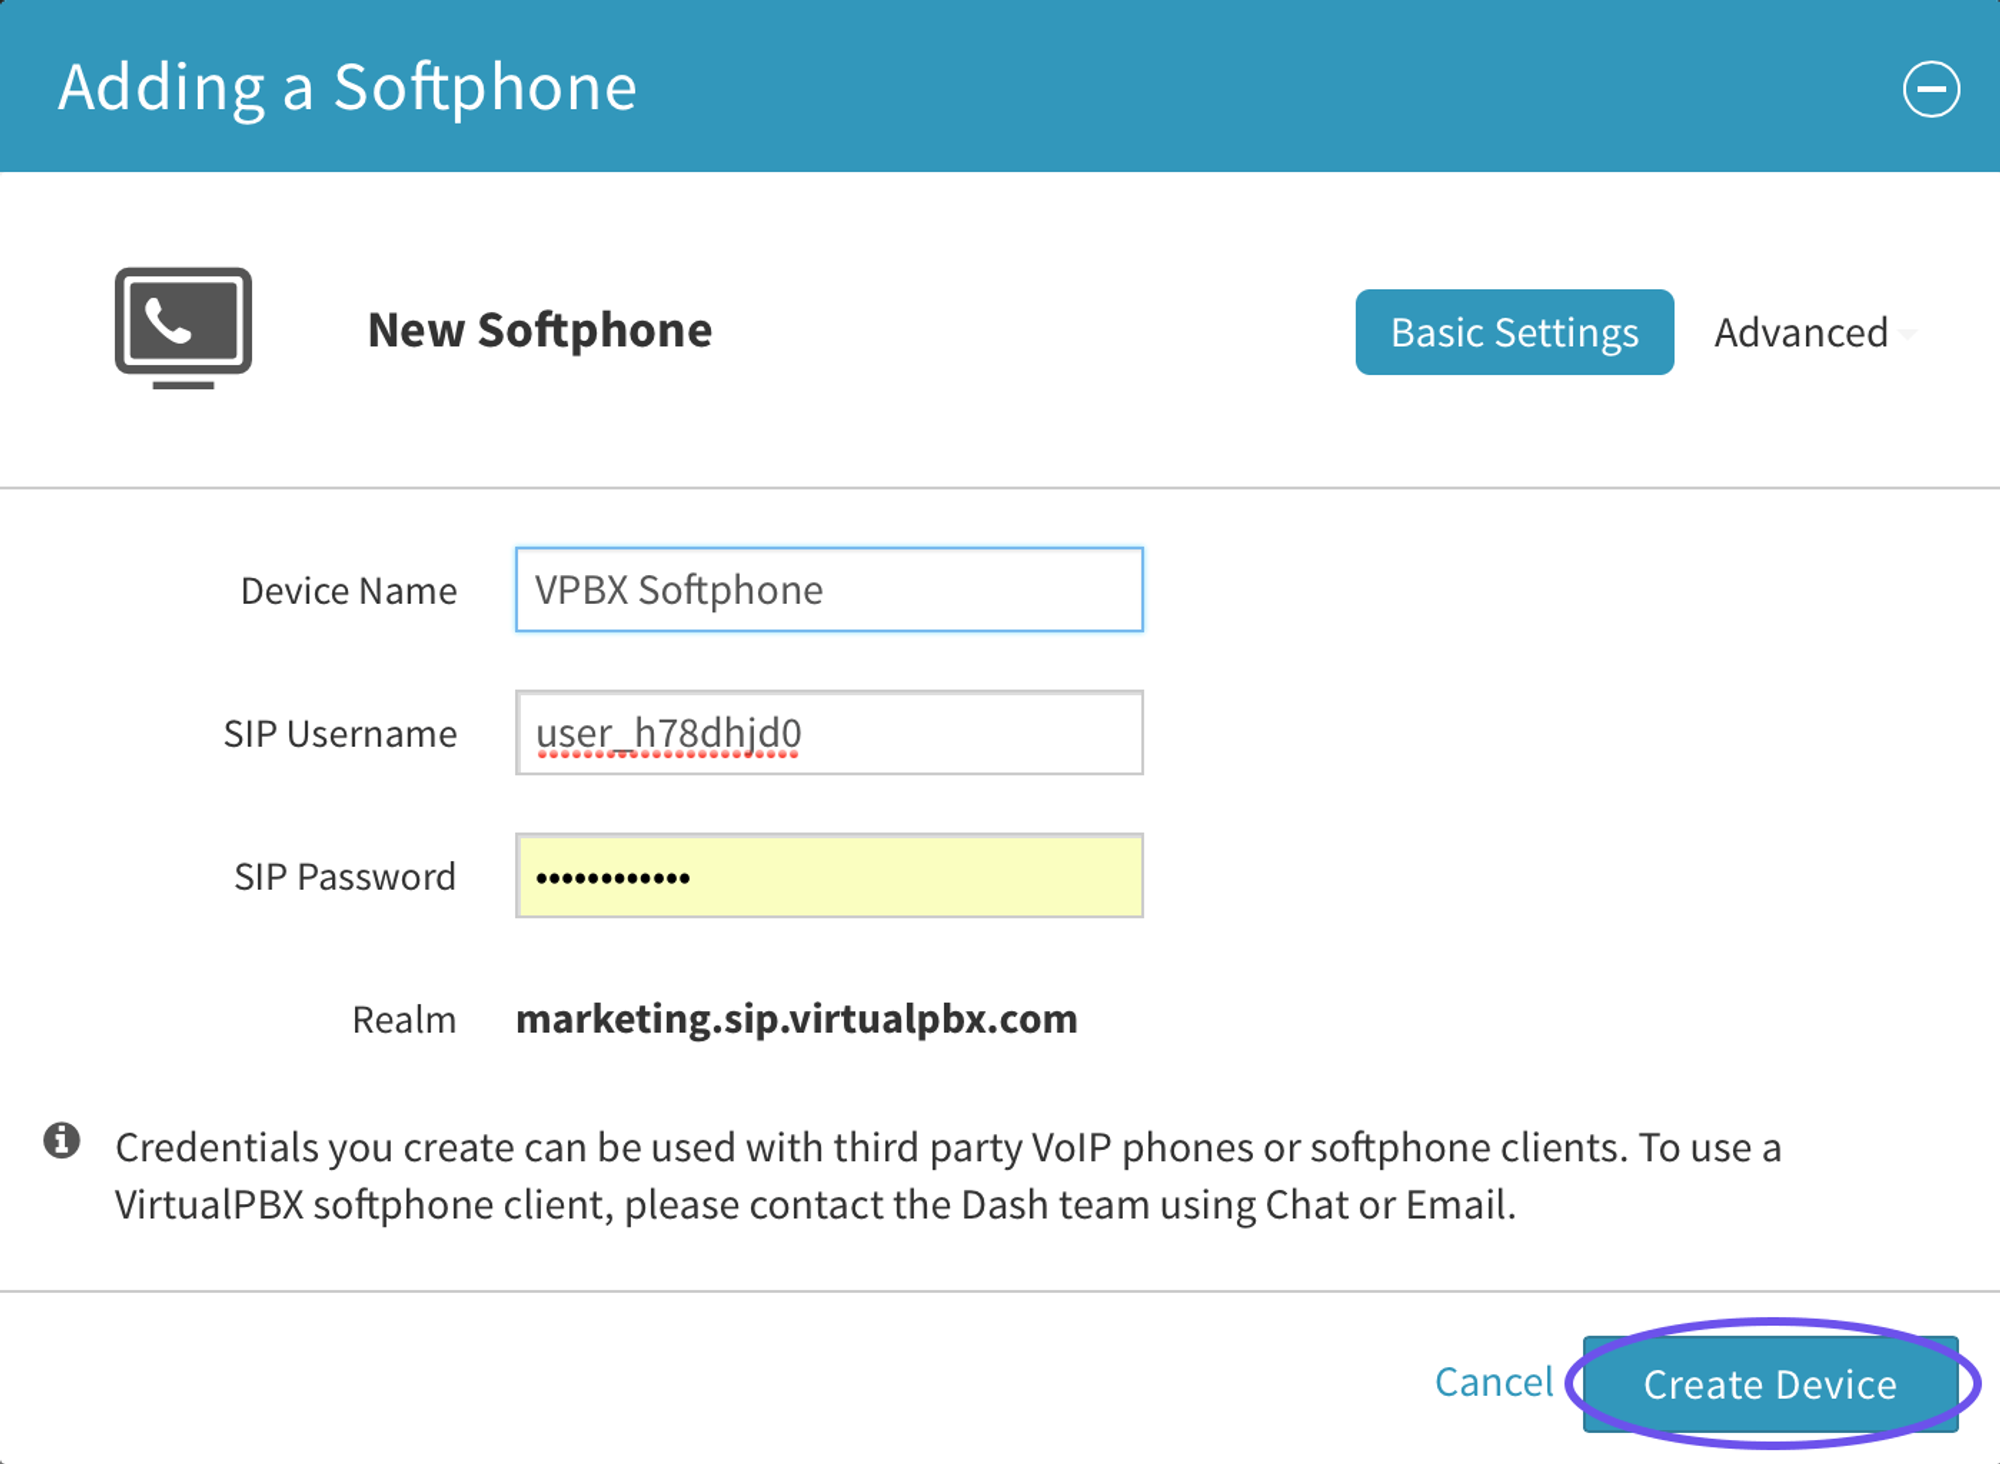
- Change your device name and click Create Device. Record this information to use in your Panasonic TGP 500/550 setup. You can always return to reference your credentials by clicking on devices (under users) and selecting the device.
- Click Save Settings
Provisioning Your Panasonic TGP 500/550
- First, you’ll need your IP Address
- Press Menu (center joystick)
- Enter #501
- Write your IP address down
- Next, enable Web Interface
- Press Menu (center joystick)
- Enter #534
- Set Embedded Web to “On”
- Press Enter
- Enter IP Address into Web browser
- Username: admin
- Password: adminpass
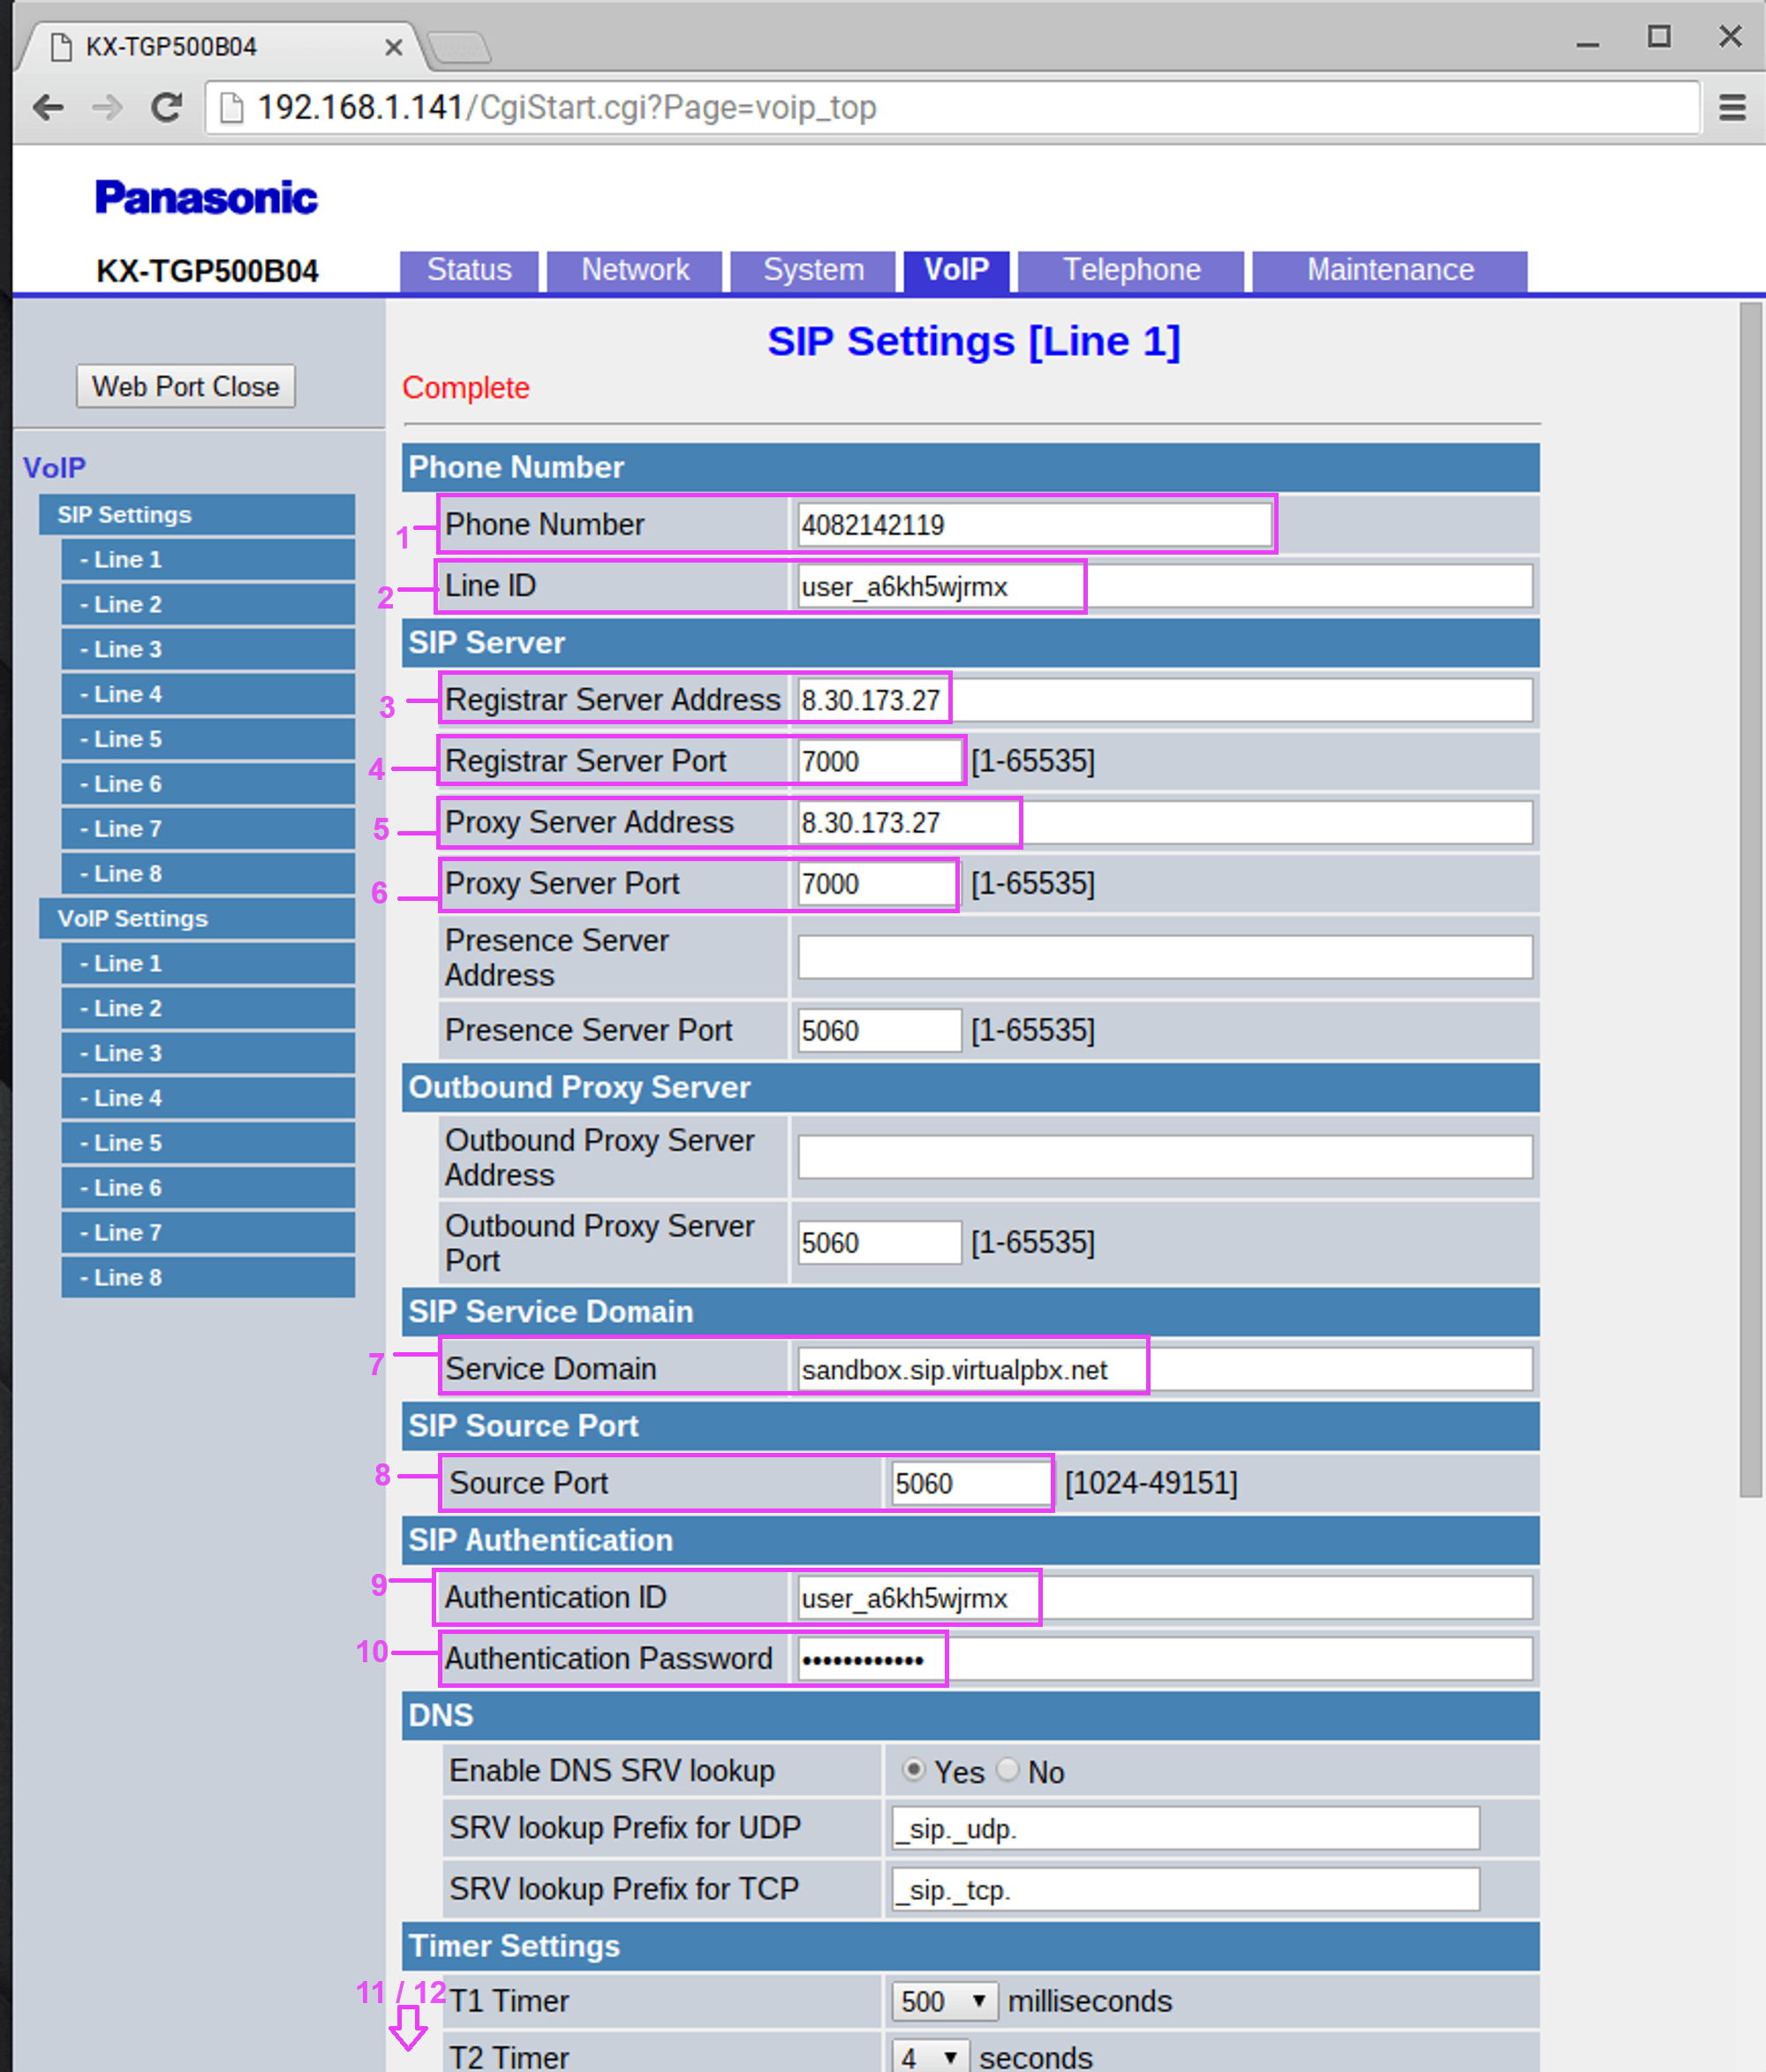
VoIP > SIP Settings > Line 1
- Phone Number: Enter what you want displayed (does not display on TGP50 Handsets)
- Line ID: Enter SIP Username
- Registrar Server Address: 8.30.173.27
- Registrar Server Port: 7000
- Proxy Server Address: 8.30.173.27
- Proxy Server Port: 7000SIP
- Service Domain – Enter realm
- SIP Source Port – 7000 (increased by 10 for each line)
- Authentication ID – Enter SIP Username
- Authentication Password – Enter SIP Password
- Enable SSAF (SIP Source Address Filter): Yes
- Click “Save” on Bottom
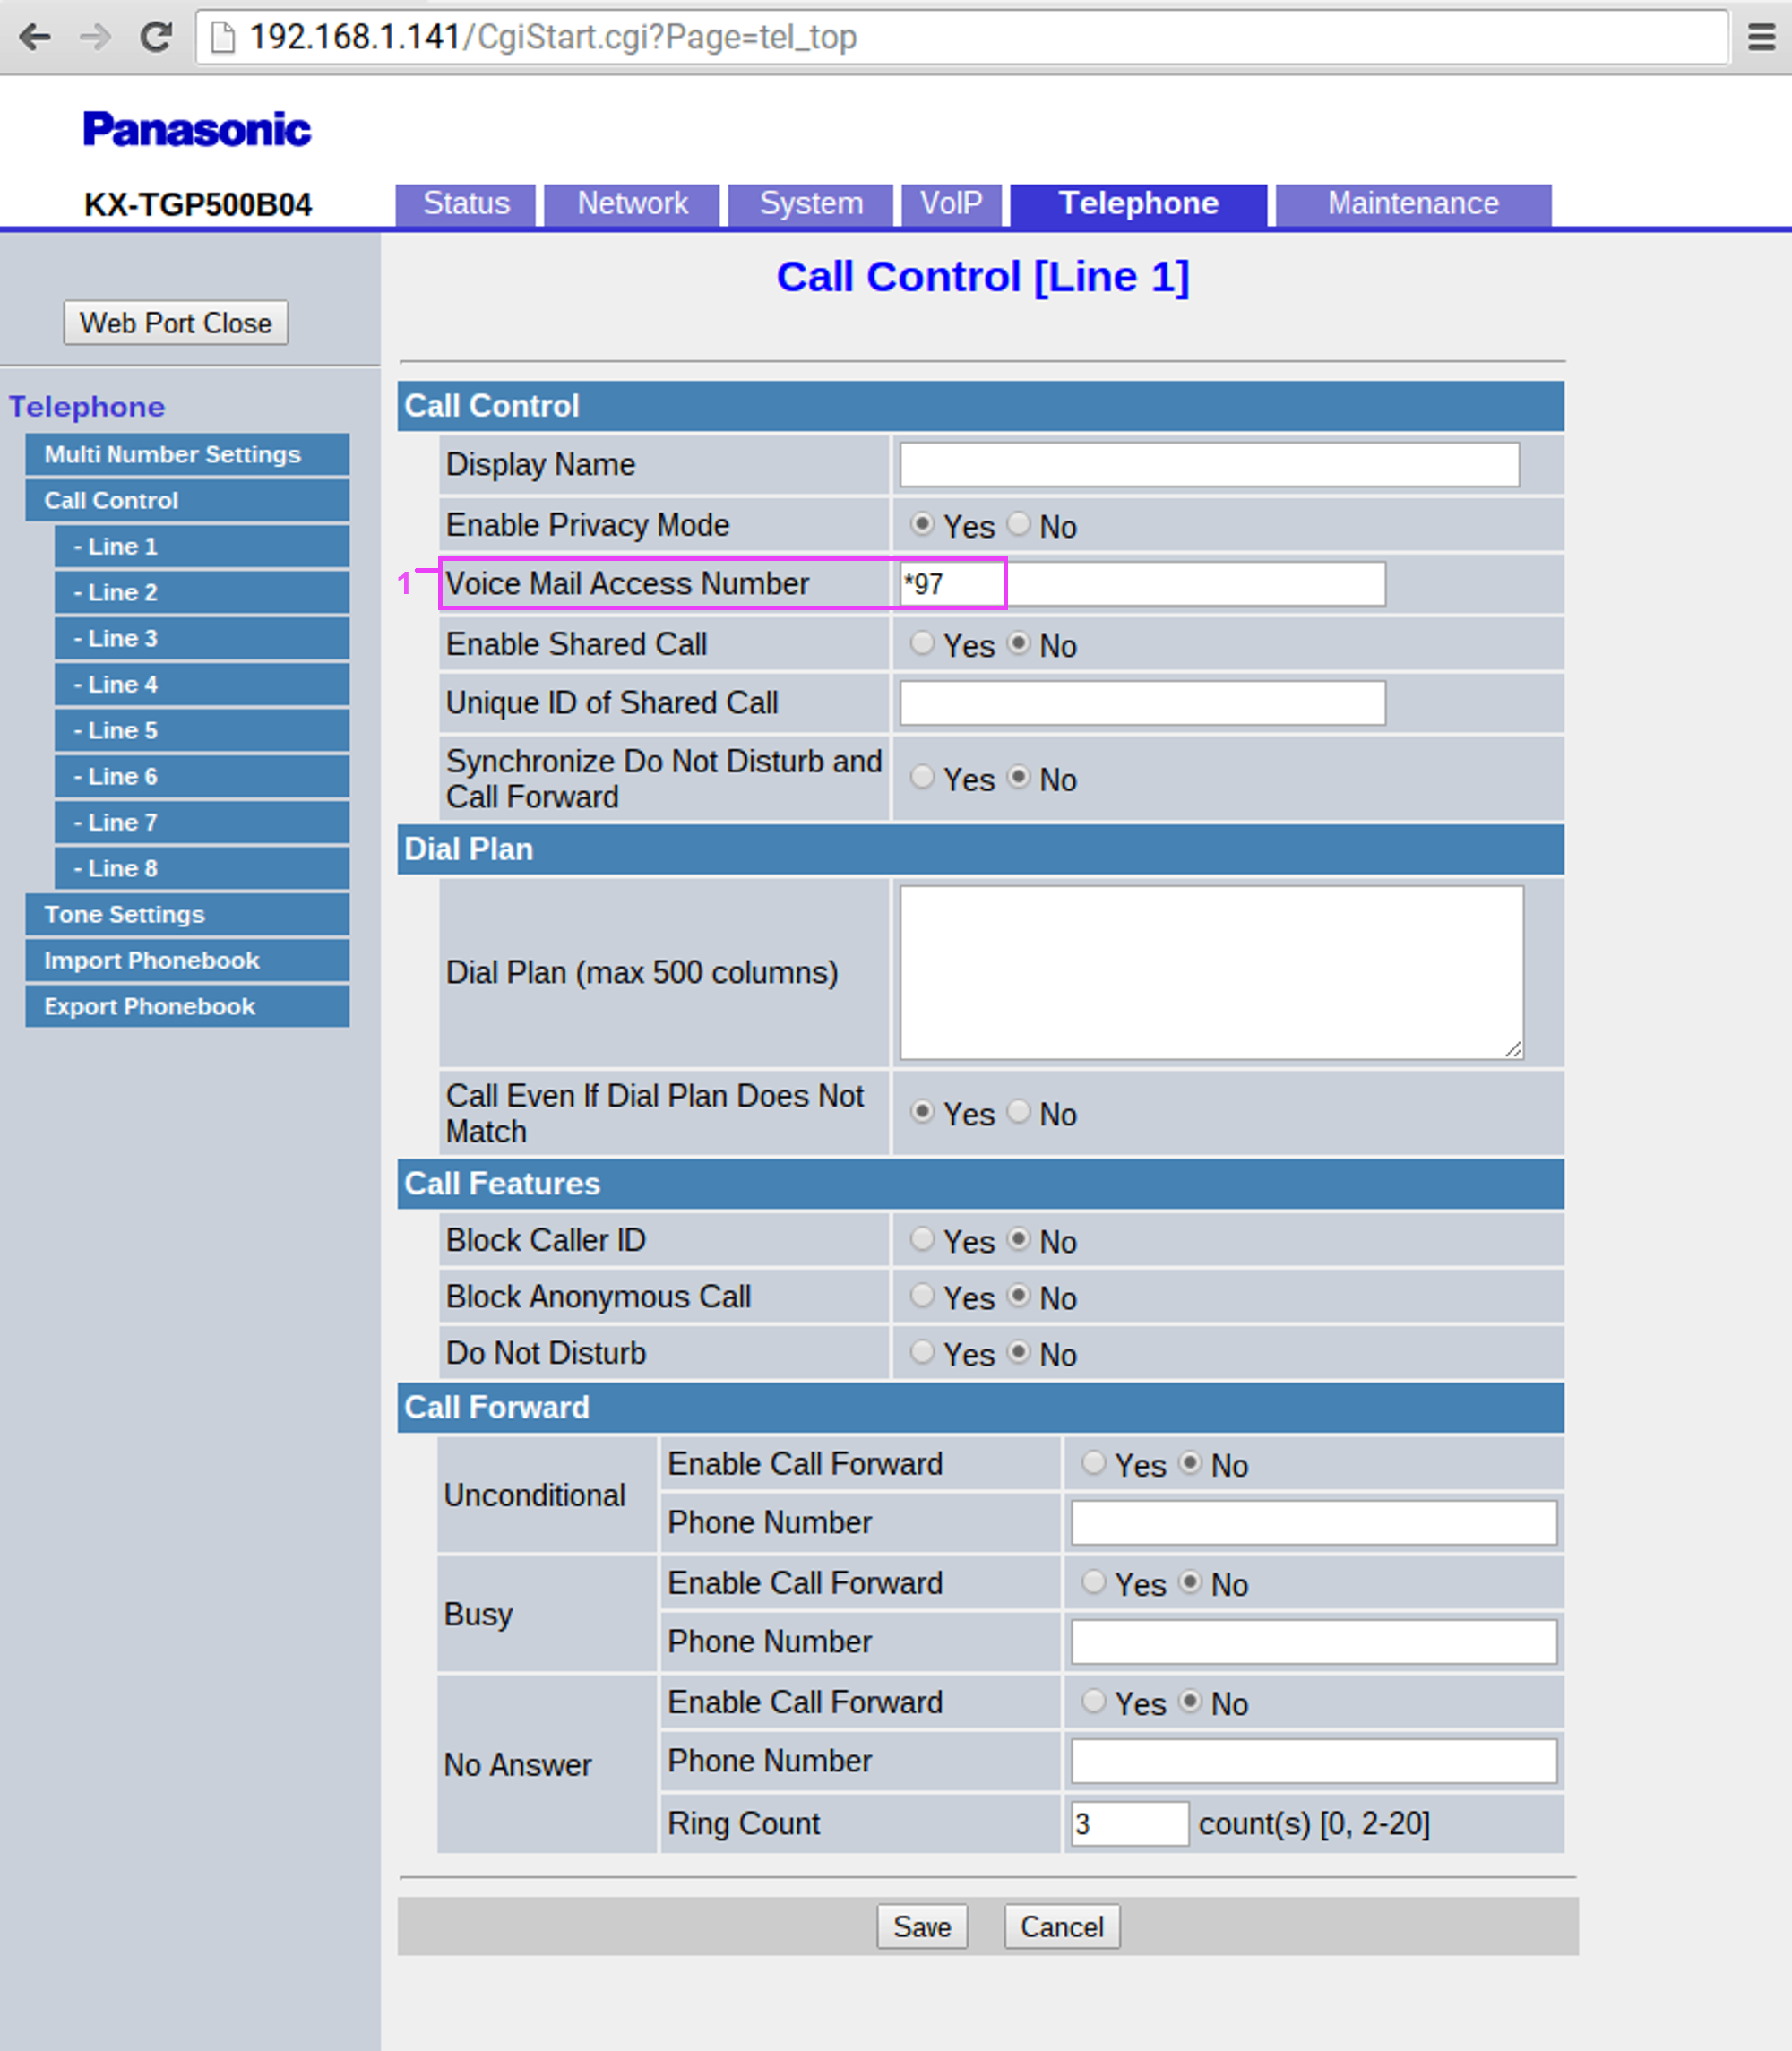
Telephone > Call Control > Line 1
- Voice Mail Access Number – *97Click “Save”
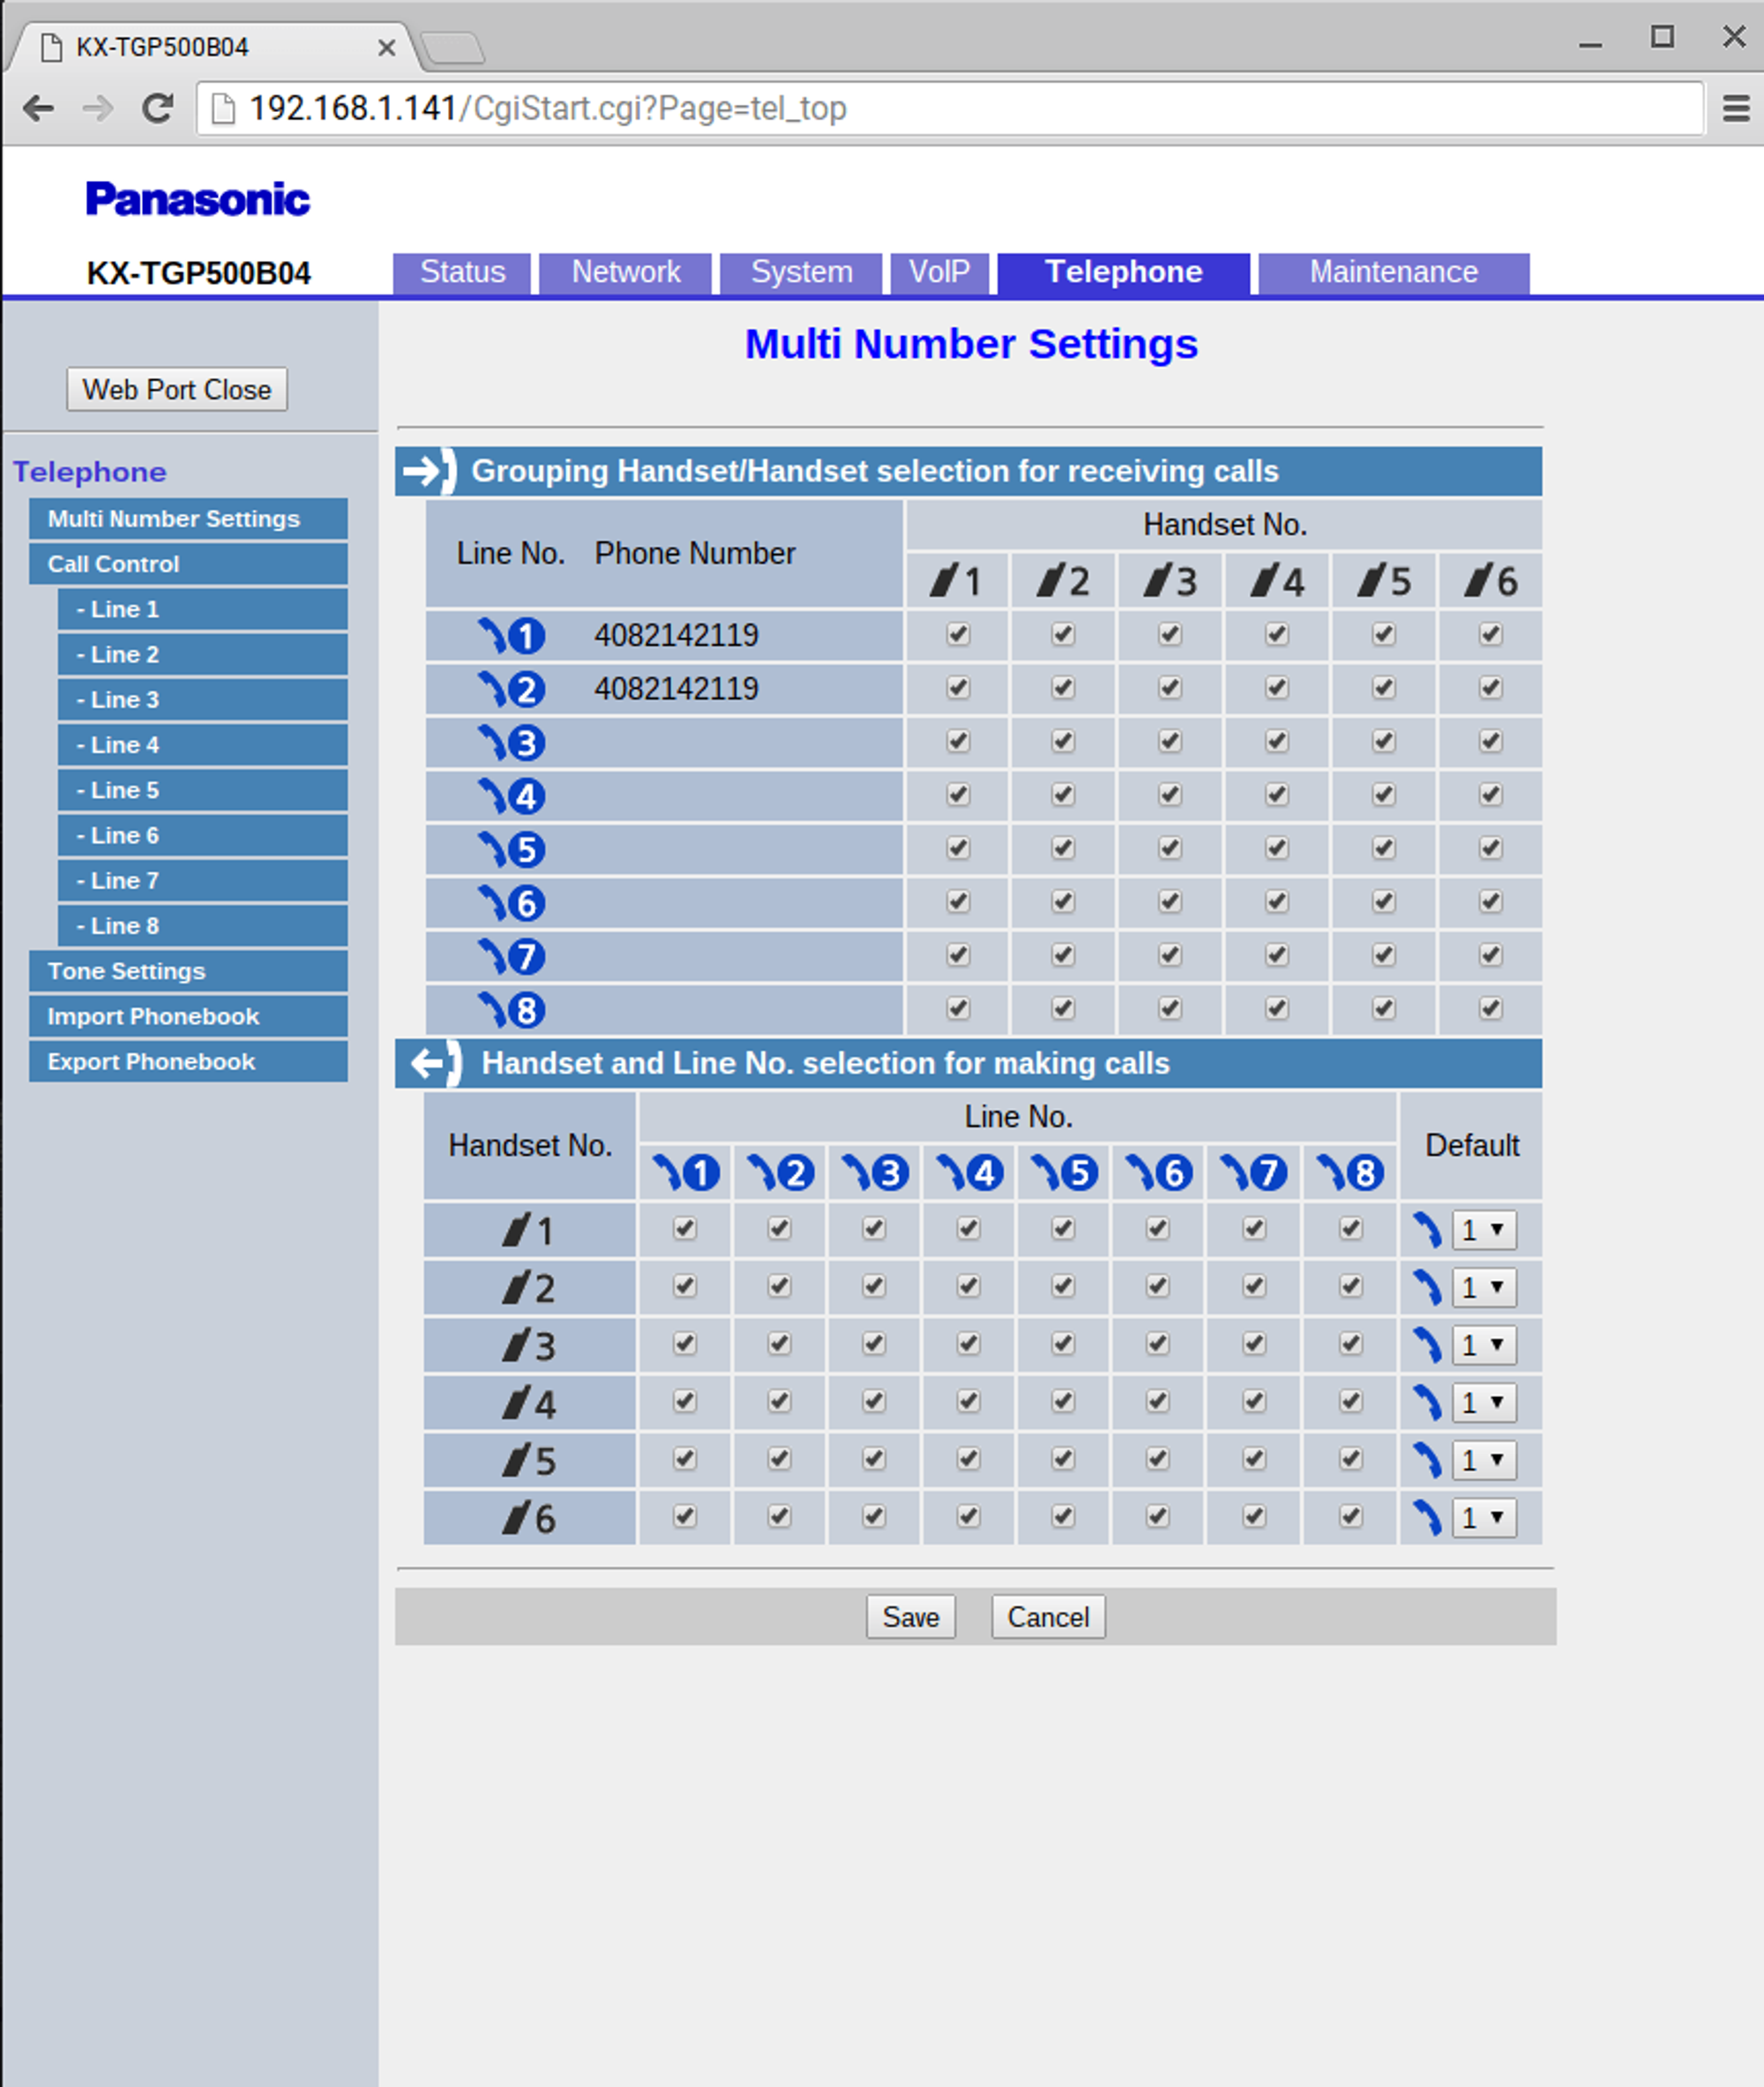
Telephone
After programing multiple lines as necessary, you can use the “Telephone” tab to determine which lines ring/use which handsets. The top part “Grouping Handset/Handset selection for receiving calls” tells the Panasonic base when a call comes in on Line X, ring handset X. In the example below, line 1 will ring all registered handsets (1-6). You can program line 1 to only ring handset 1, or handset 3 and 6 or any combination.
The bottom part “Handset and Line No. selection for making calls” allows you to select when a handset makes an outbound call, which line it can use. In the above example, Handset 1 can make an outbound call on any line but by default it goes through line 1. You can change it so handset 2 only rings from line 2 or handset 4 rings from line 2 and 5 but defaults to 5.
There are two main types of behavior you can program.
- All handsets ring simultaneous (which is the default selection)
- Have each line ring handsets individually. You will want to adjust the Telephone tab so each handset is assigned to it’s own individual line (IE: Line 1 / Handset 1 - Line 2 / Handset 2).