Setting Up E911
The importance of managing e911 settings cannot be understated - It is used for emergency dispatch services if 911 is dialed from a given VoIP device. Details can matter drastically here in the event of an emergency. If you have any questions, do not hesitate to contact our team, open 24/7, to help you set this up at 888.825.0800 option 2, or by emailing support@virtualpbx.com.
Please fill out the corresponding physical location that emergency services should travel to if “911” is dialed. By default, the information input into your Main Number will trickle down to all devices and phone numbers. However, you may choose to set different location information for these, as explained lower in this documentation
Main Number E911 Settings
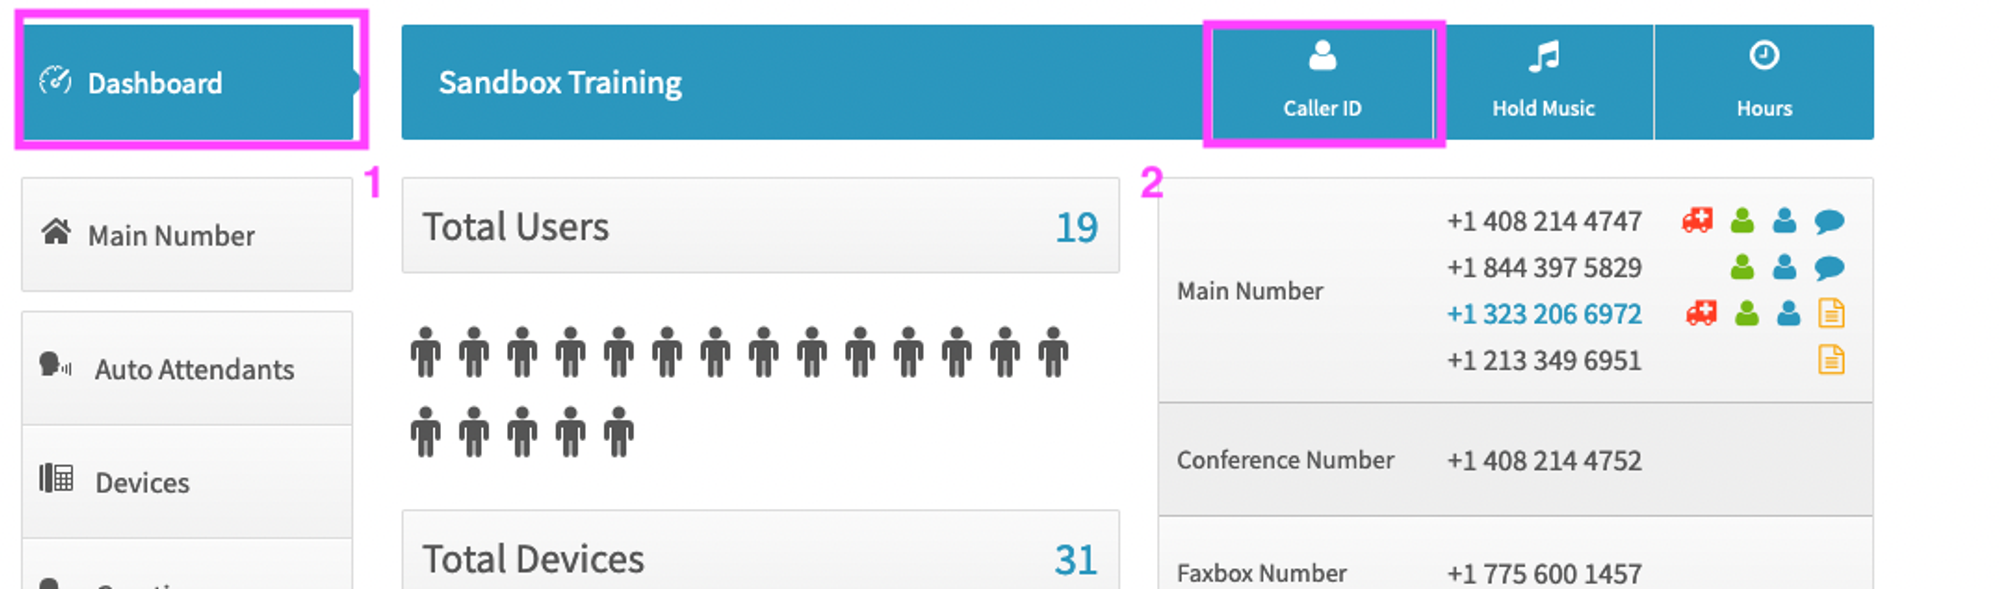
- Make sure you are in the “Dashboard” section of the Admin User Interface.
- Click “Caller ID”
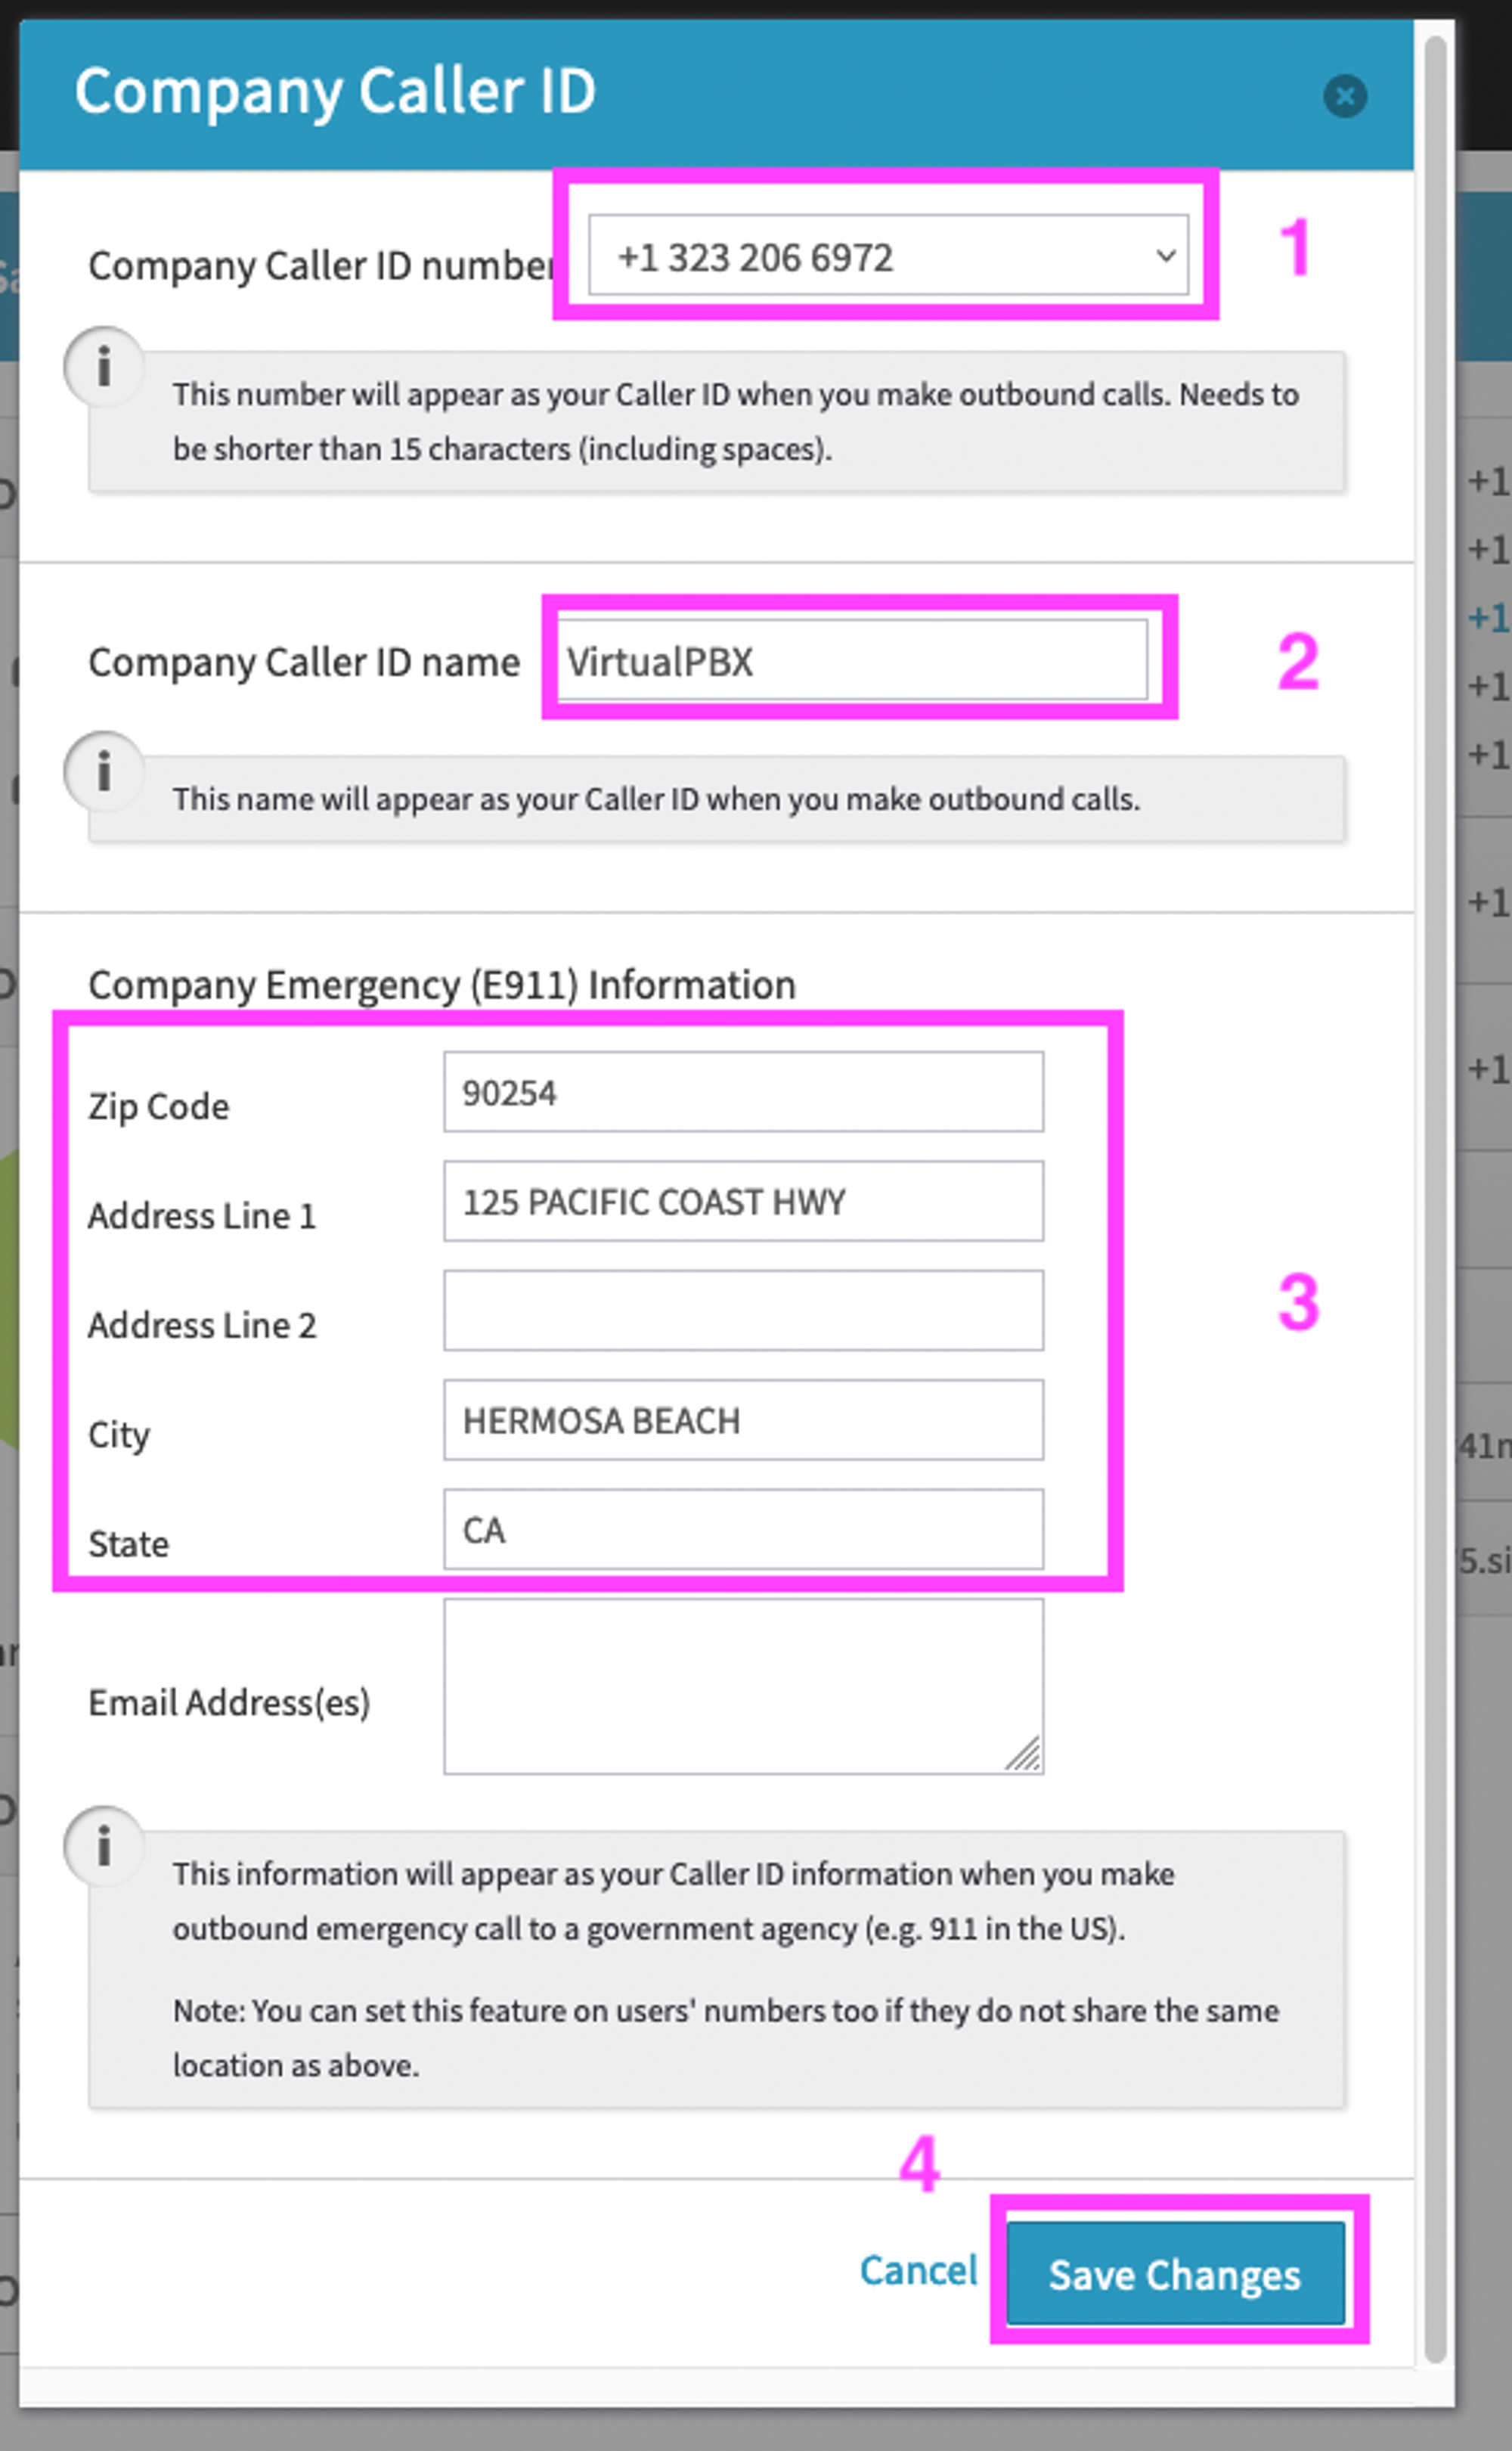
- Select what you would like your default outbound Company Caller ID number to be
- Optionally, type in your desired Company Caller ID name. This is restricted to 15 characters including spaces and will show on outbound calls in addition to your Company Caller ID number IF the receiving caller’s phone provider allows for it.
- Input the physical location that emergency response services will receive if any of your VoIP devices dial 911, so long as they follow the default e911 rules (all VoIP devices are set to this location unless specifically indicated otherwise, see “Alternate E911 Addresses” below)
- Click on Save Changes when you’re done.
Alternate E911 Addresses
By default, e911 information is shared from the main number. Alternatively, you may assign a different e911 address to another phone number and assign that phone number to applicable devices.
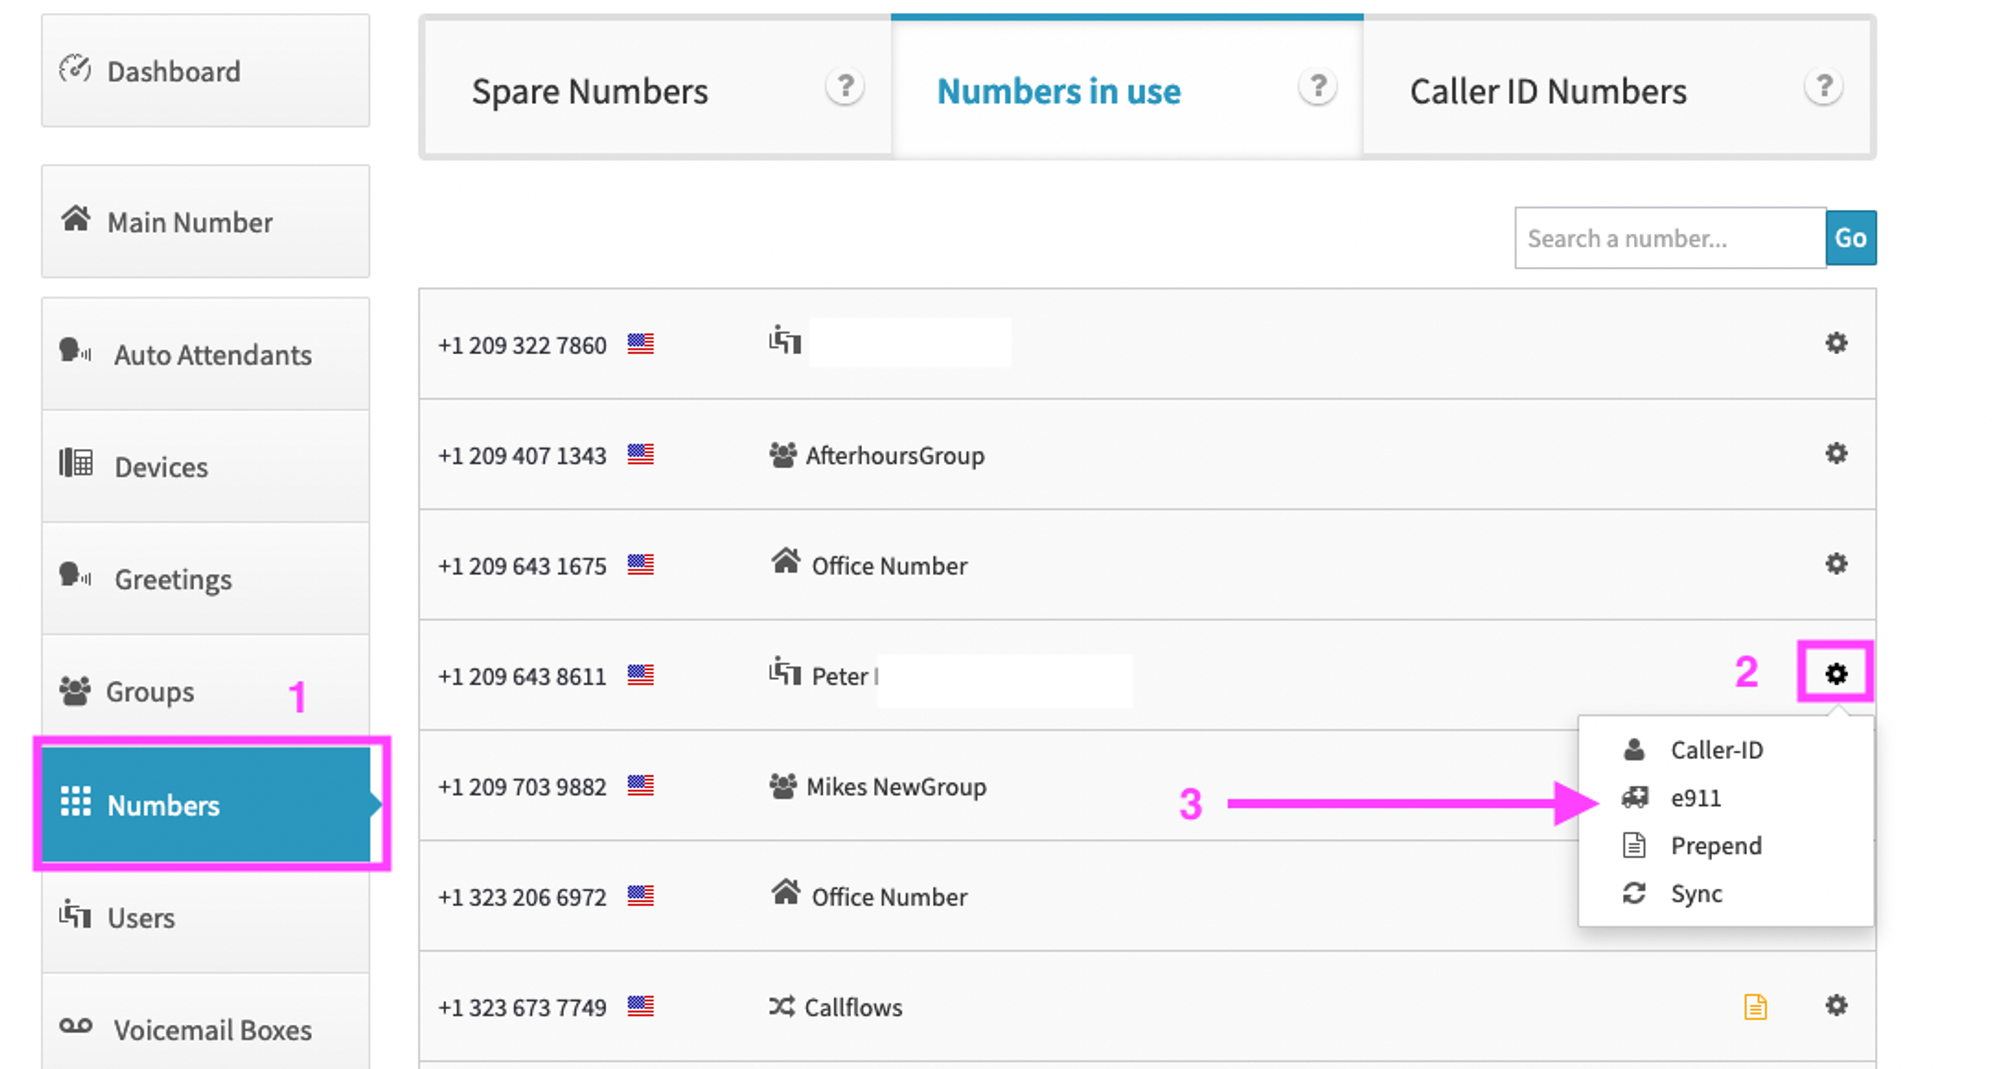
- To add the e911 address to a number, click on the Numbers menu option from the Dashboard.
- Select the number you would like to edit from “numbers in use” by clicking on the gear icon to the right of the number
- Select e911.
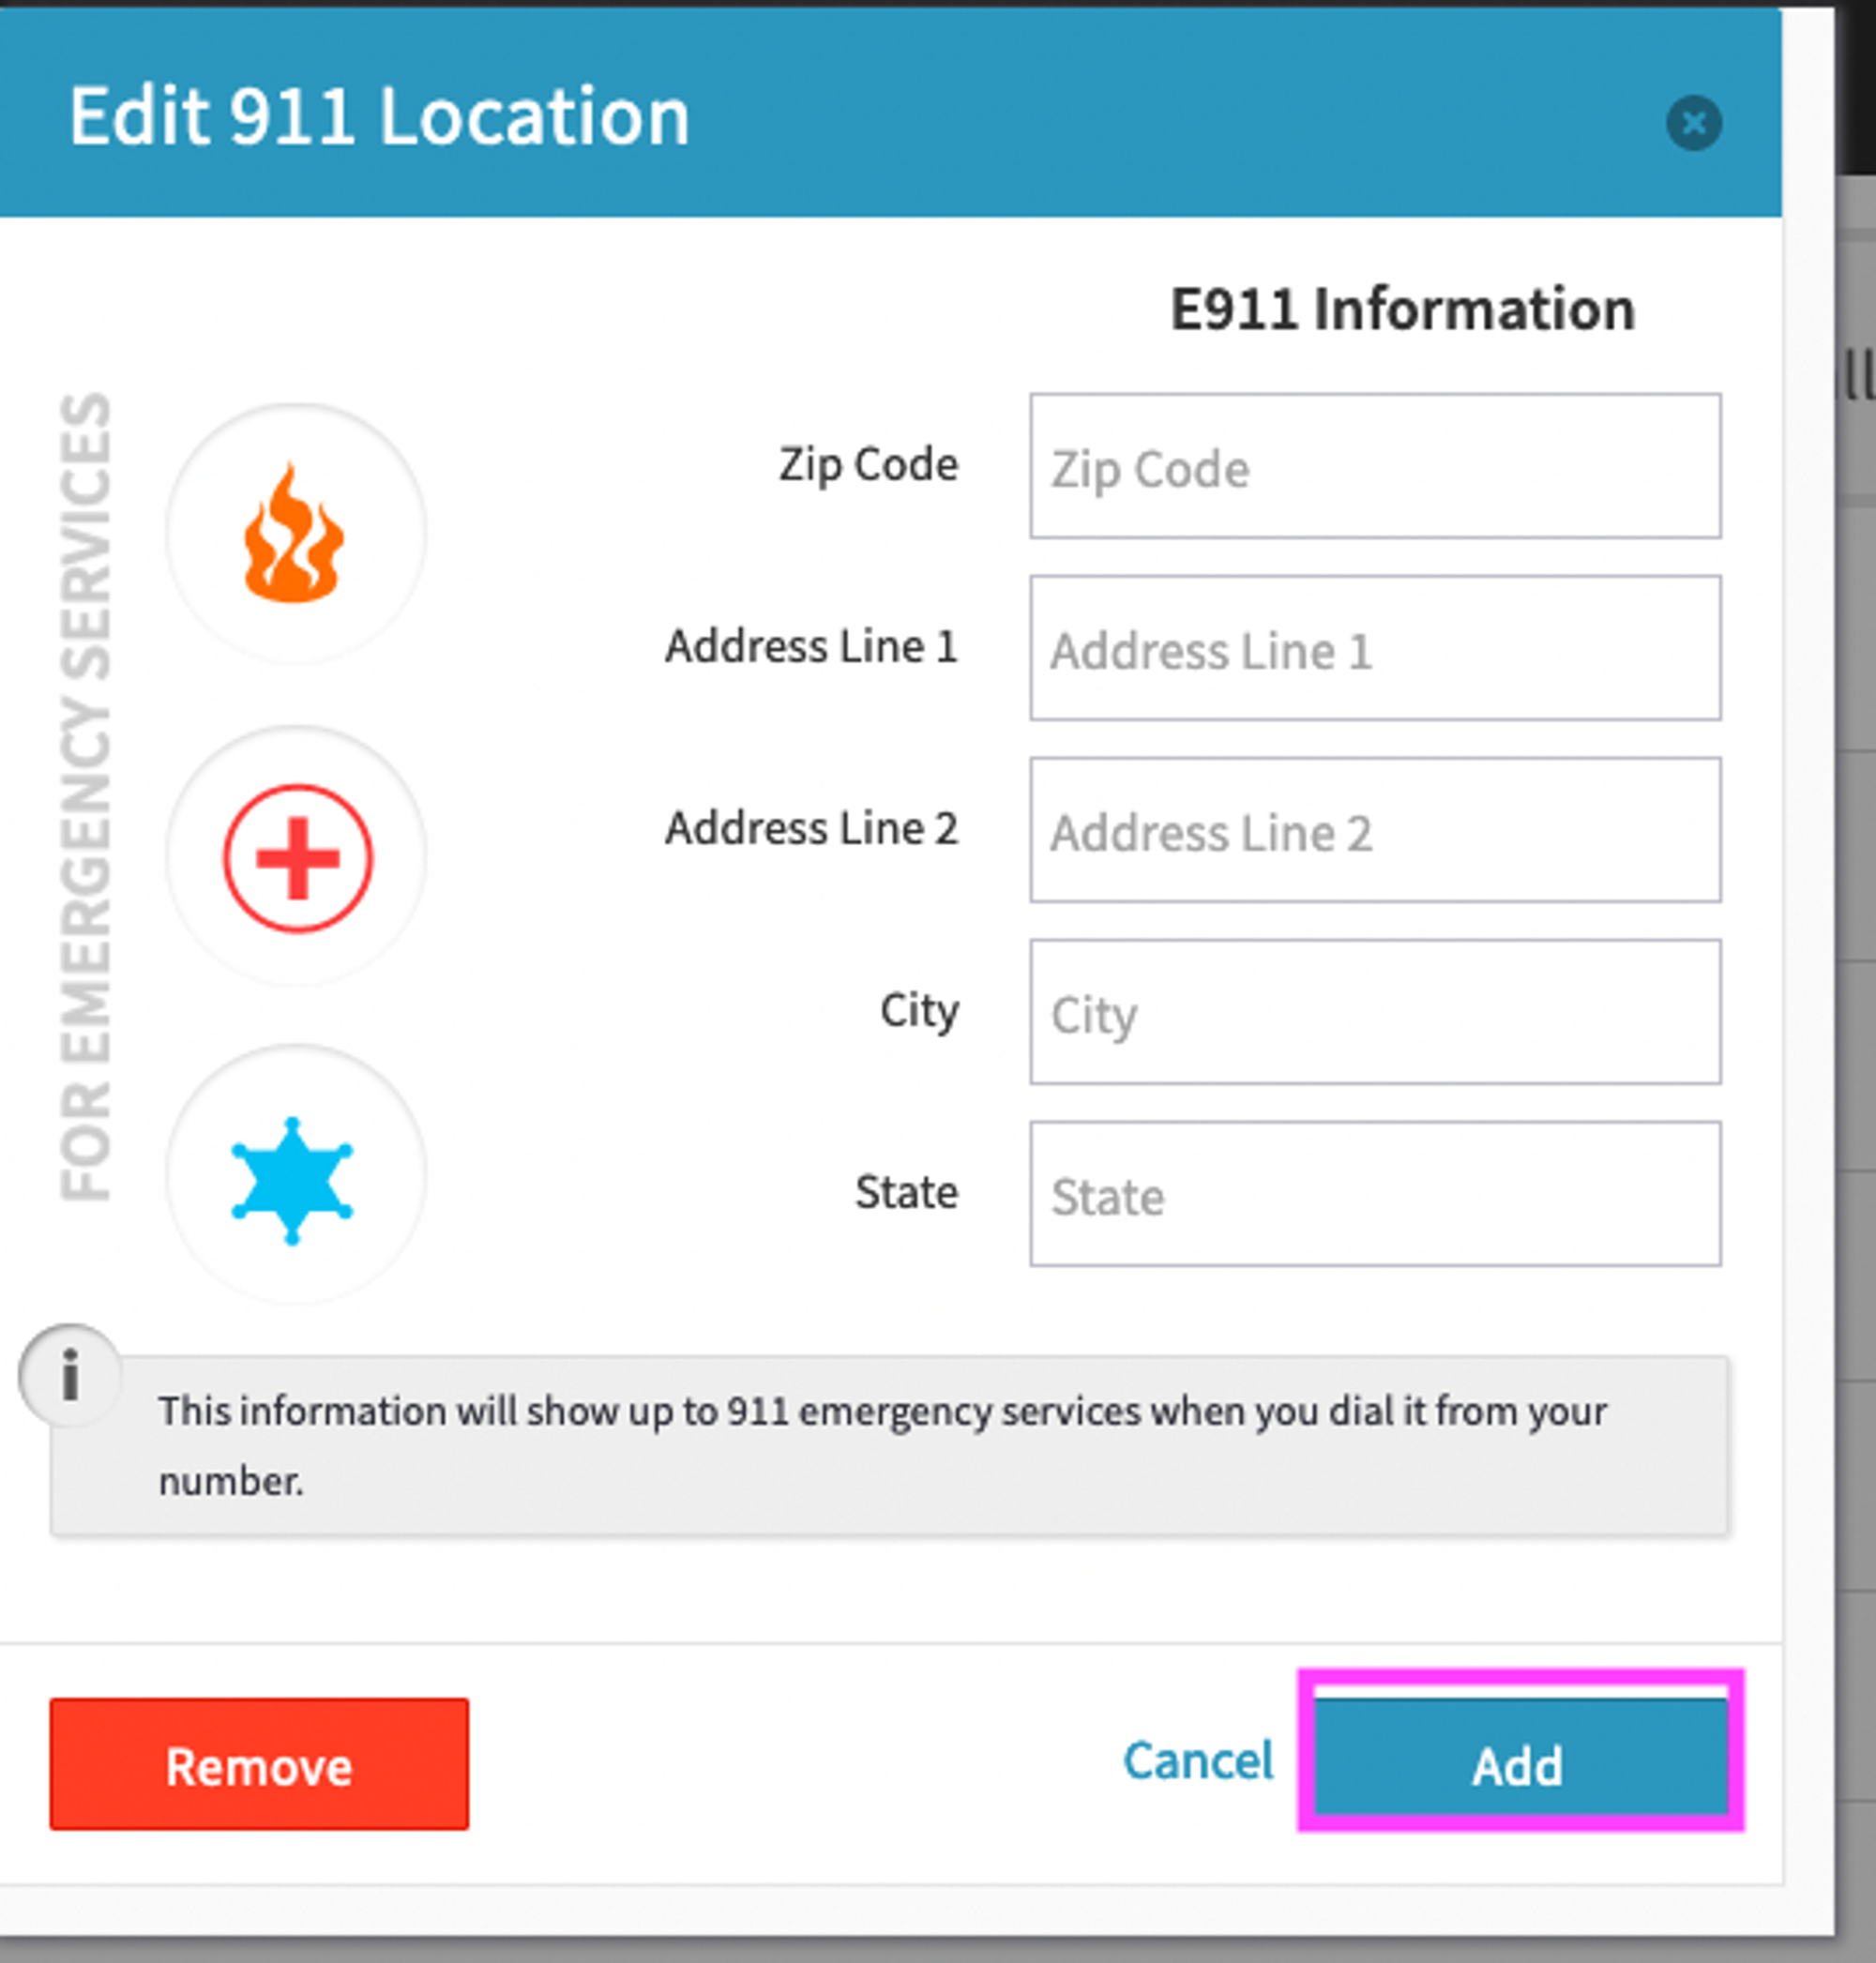
Enter the e911 address for the number and click the “ADD” button to save.
Now that e911 address has been set on the appropriate phone number we need to apply that to the VoIP device(s).
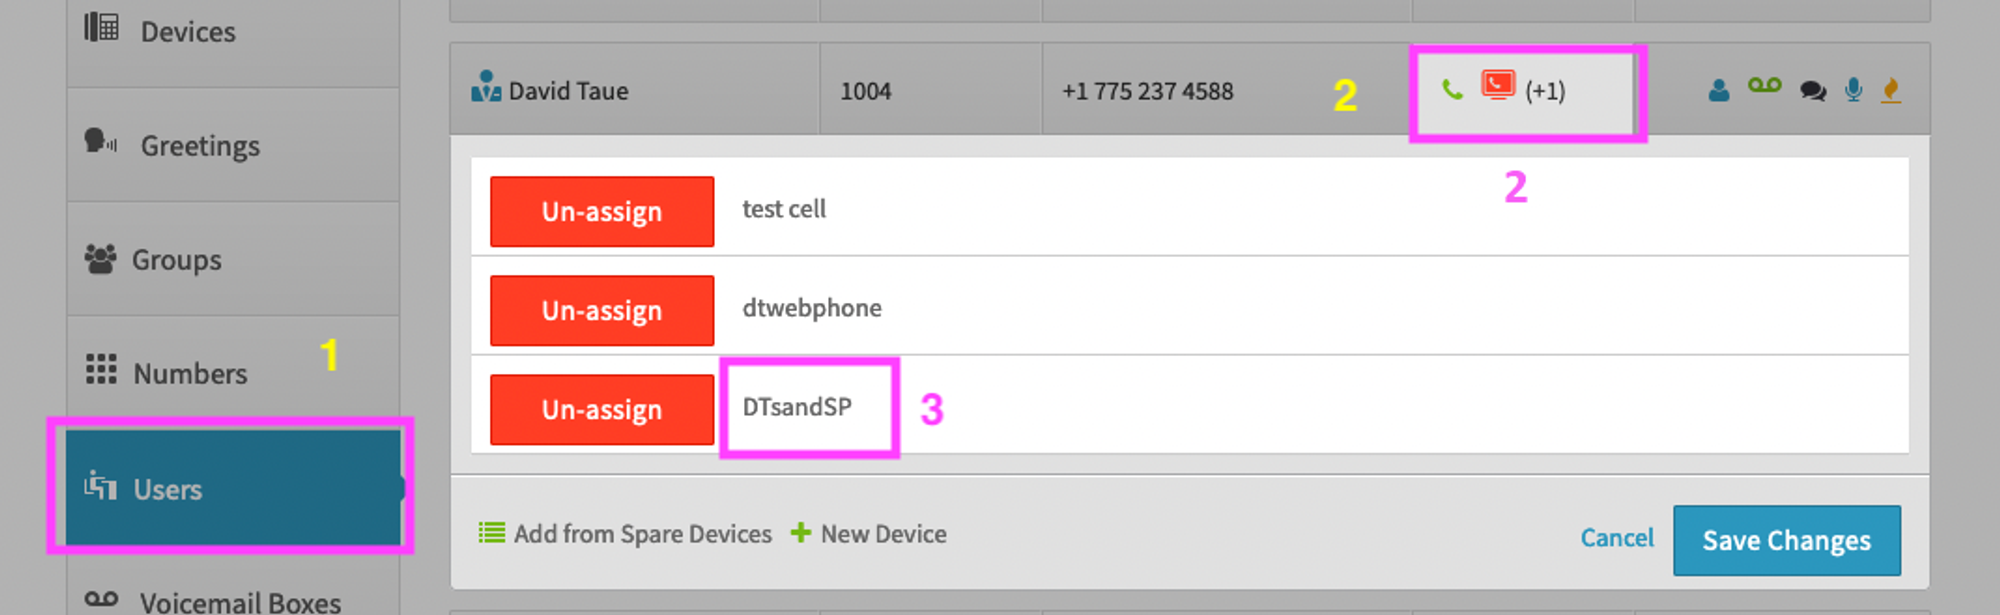
- Start by clicking on Users on the left hand side
- Click on the user’s device box for the user that you wish to work with
- Click on the device name that you want to adjust
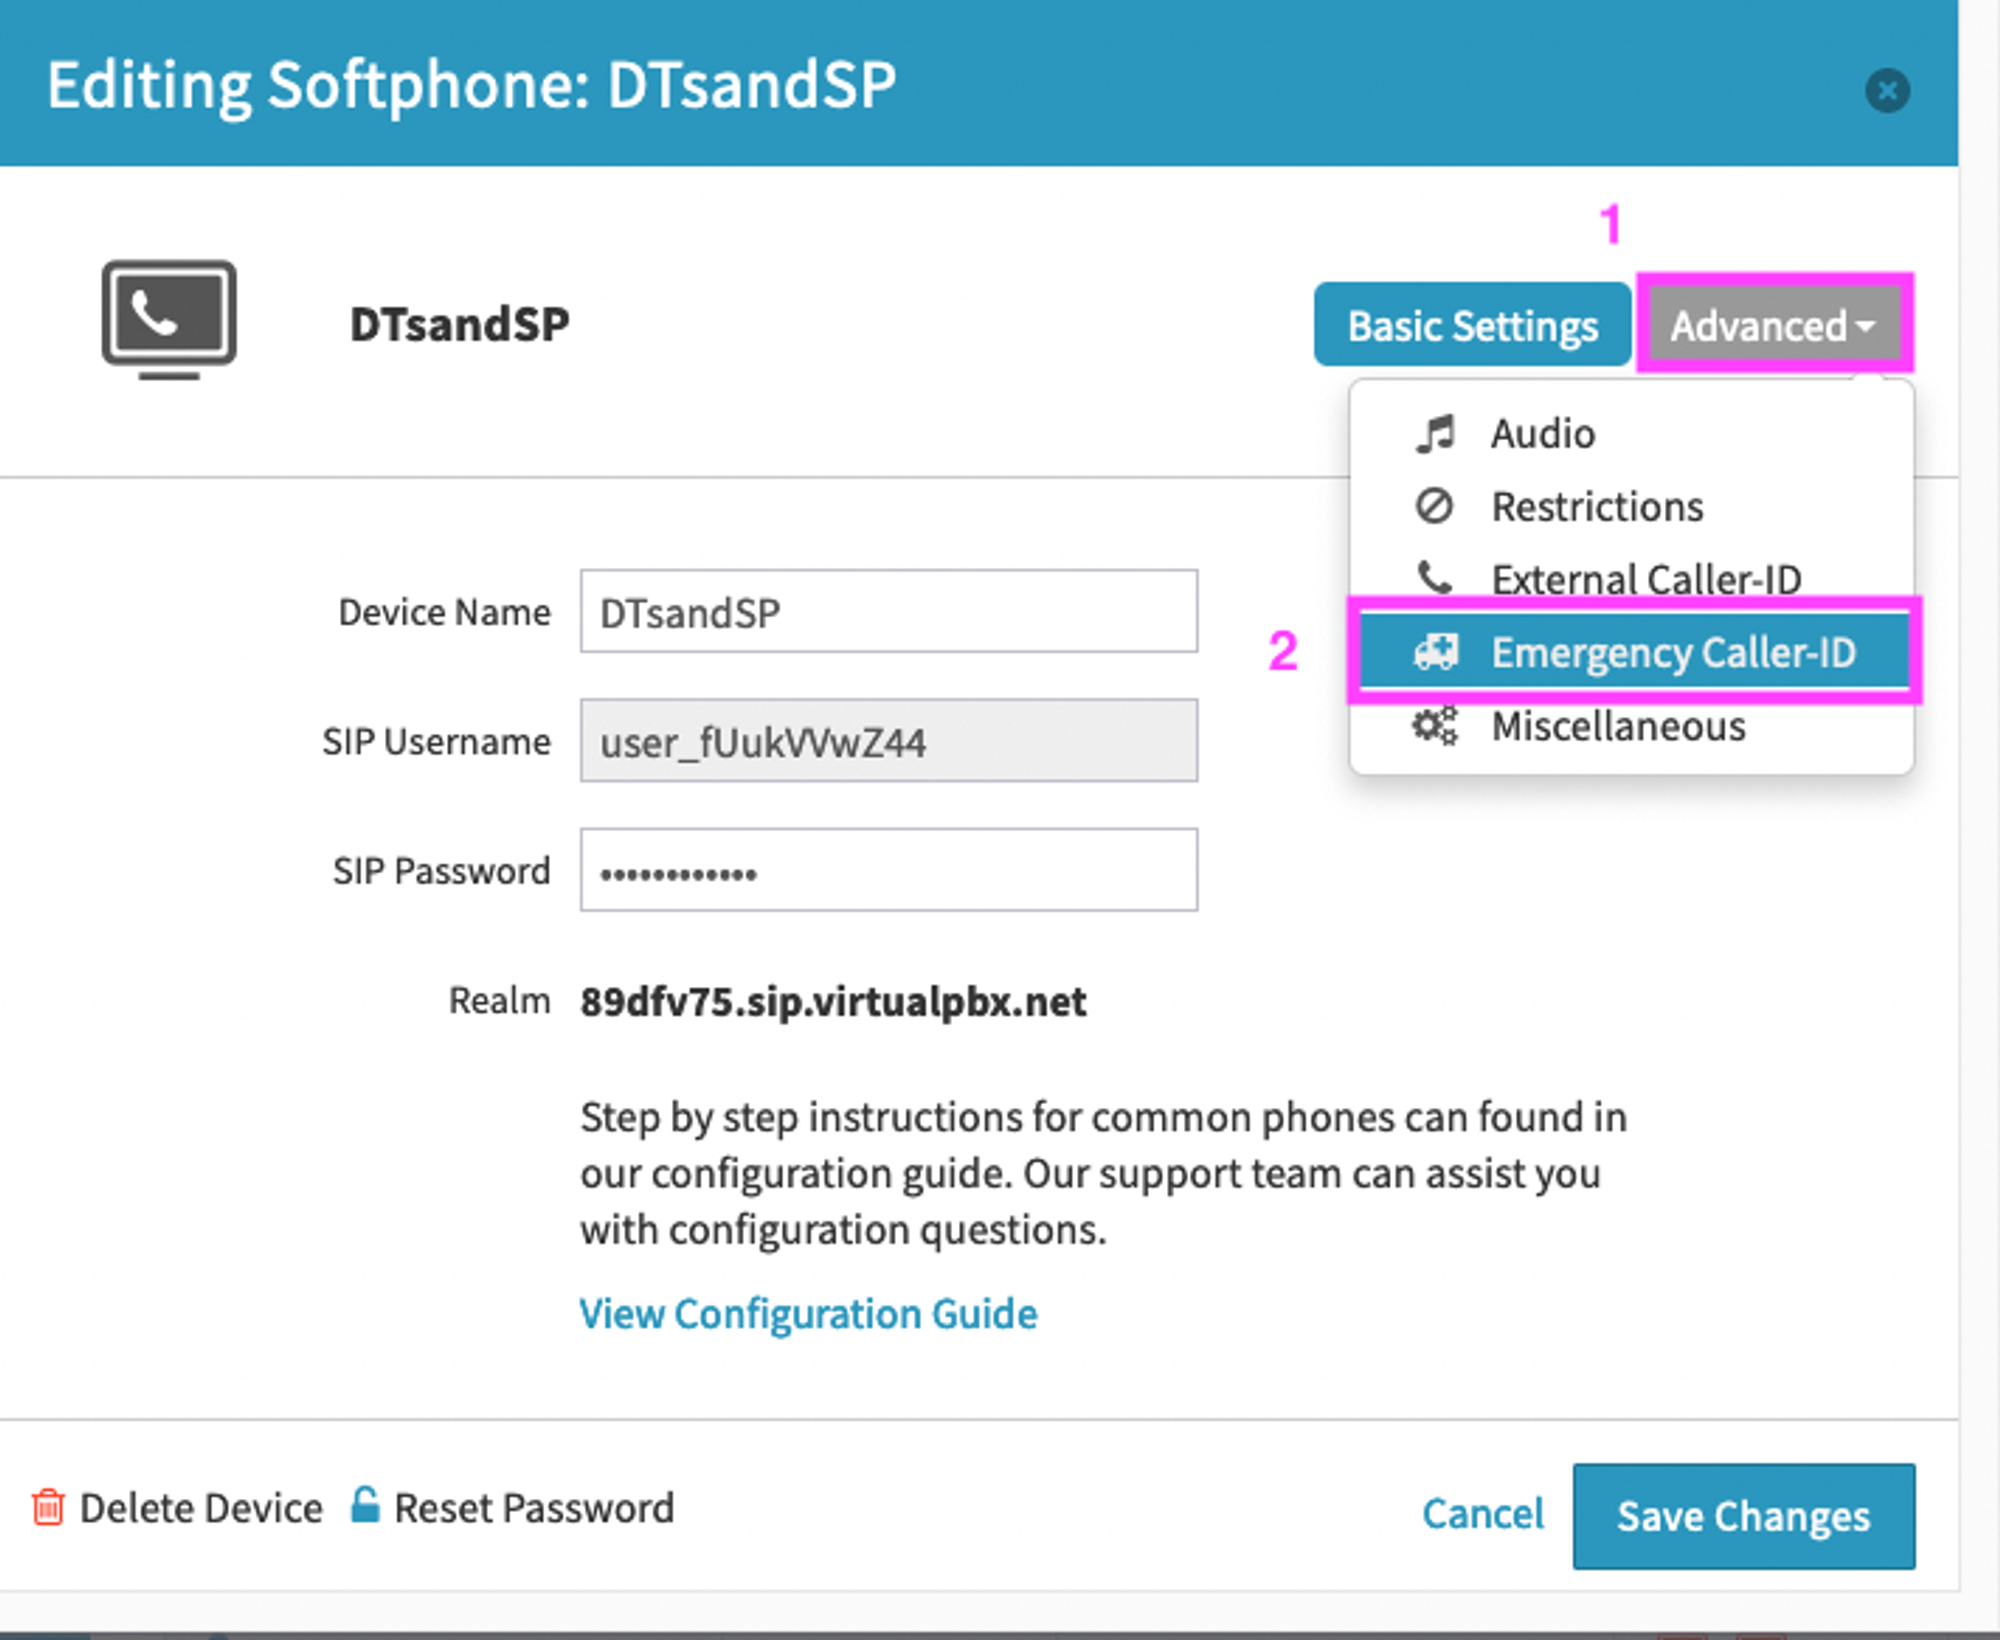
- Click on Advanced at the top right corner
- Click on Emergency Caller-ID
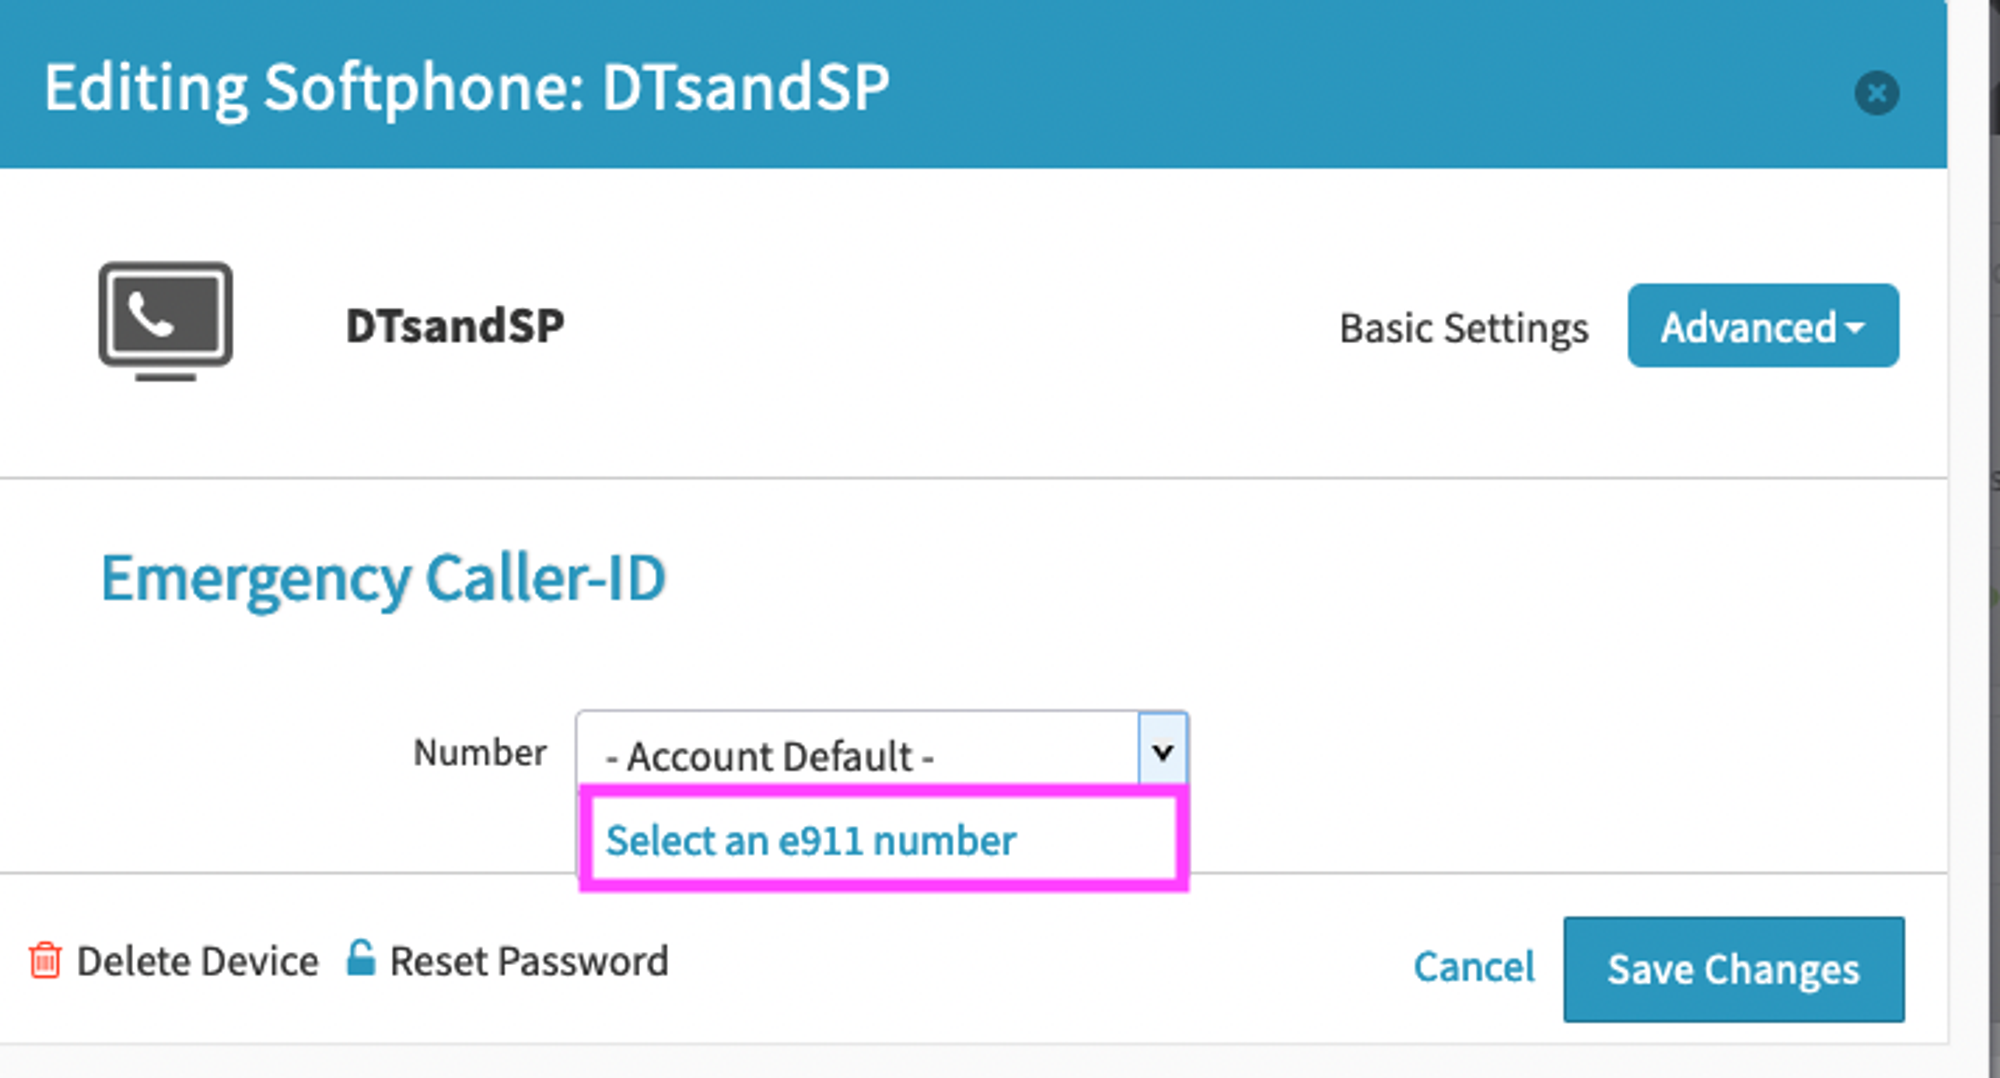
Click on Account Default in the dropdown and click “select an e911 number”
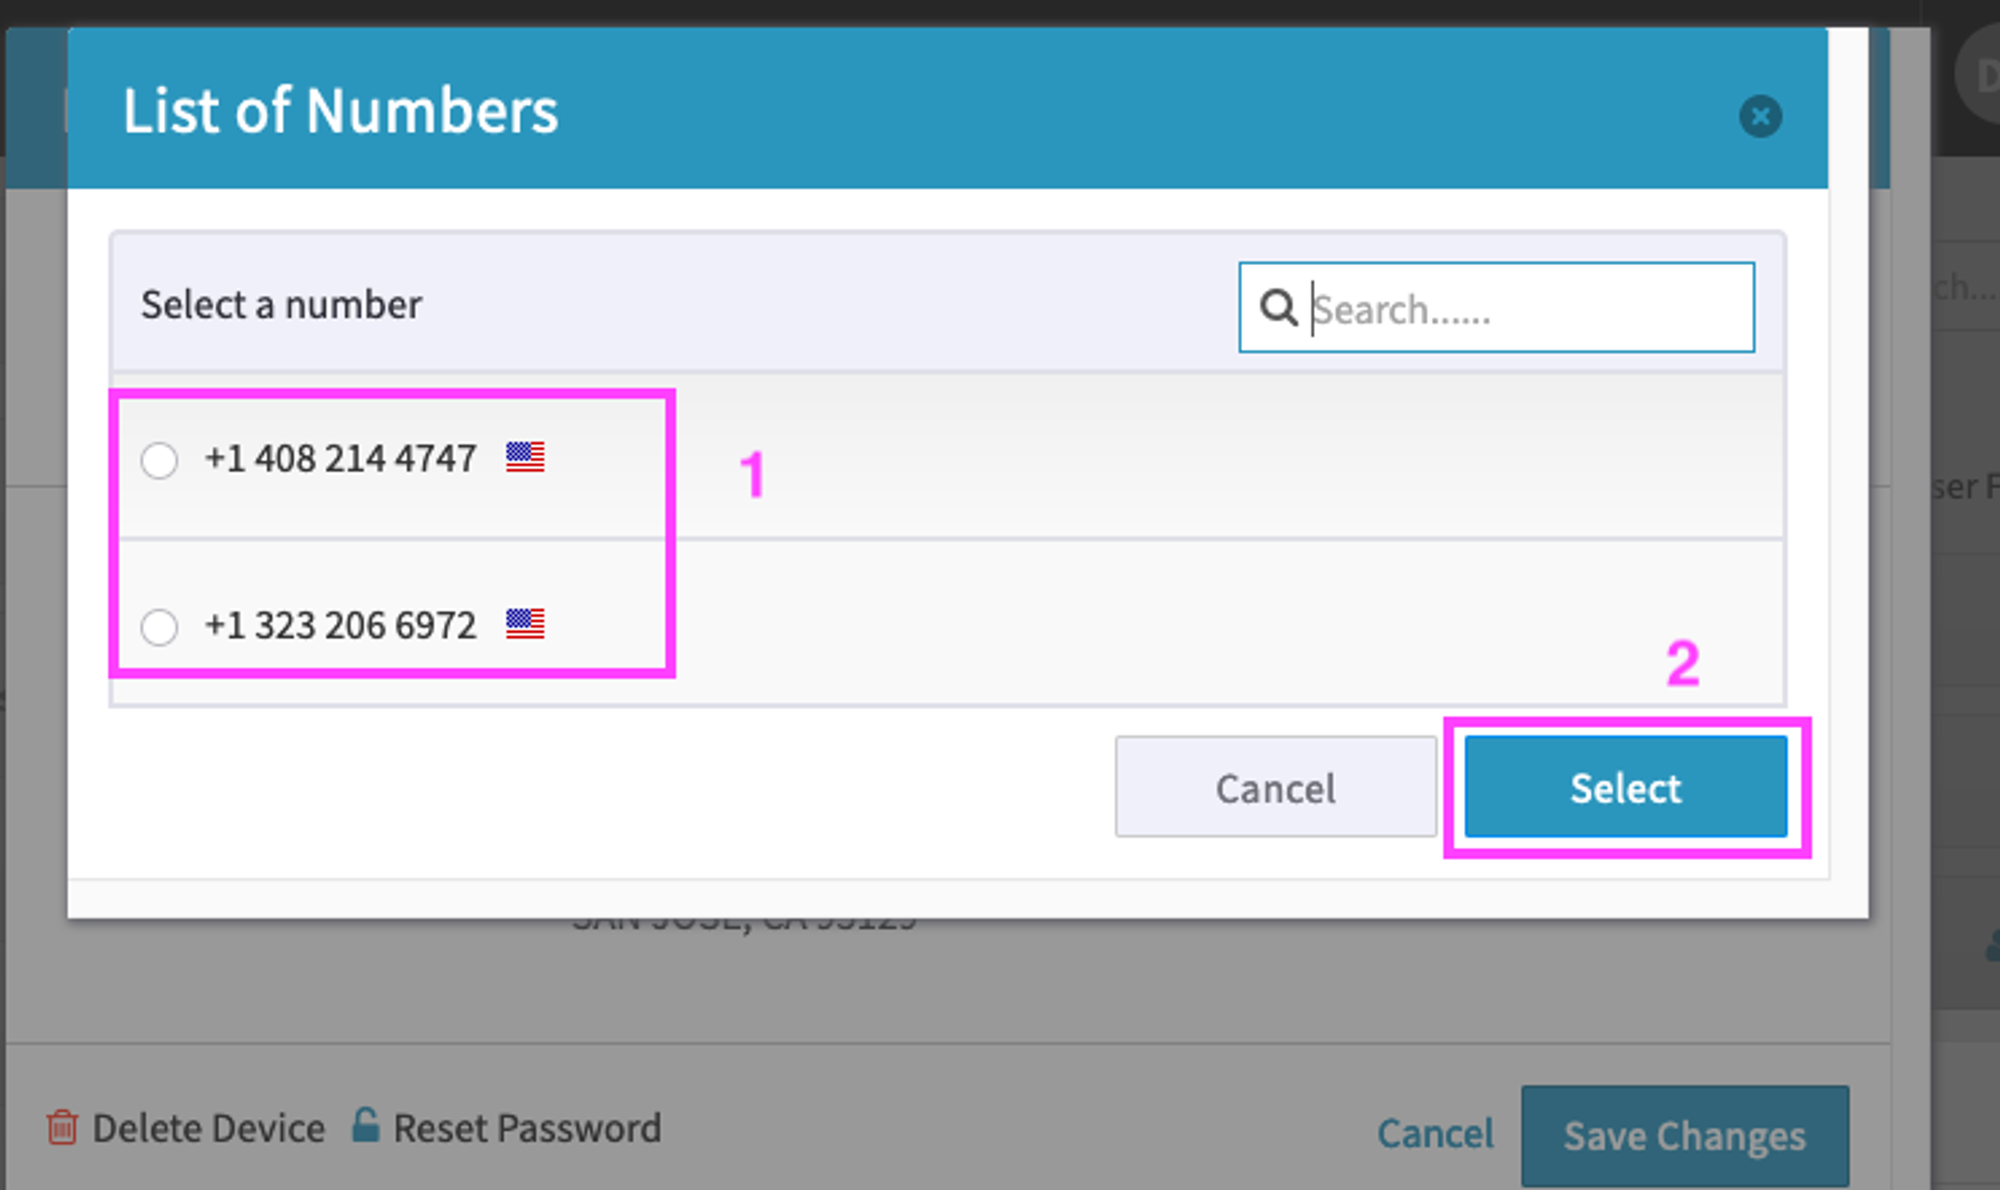
- Choose the e911 number you wish to use for this device
- Click Select
Keep in mind that multiple devices can share the same e911 number.
Once selected the device will use the e911 address associated with the number you have set.
You may now test your device’s e911 settings by dialing 933 from that device. The automated system will then read back the phone number and address that would be given to emergency services should a real call to “911” be placed.